Monday, November 19, 2007

Daring Bakers on a "diet"

Photo Sharing and Video Hosting at Photobucket
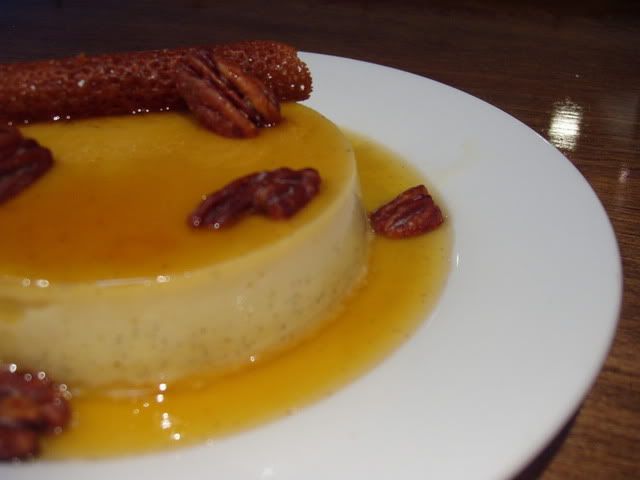
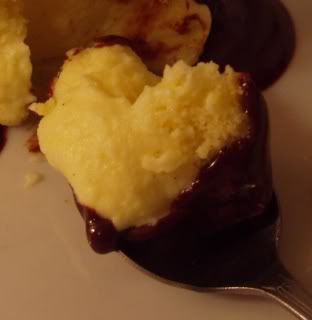
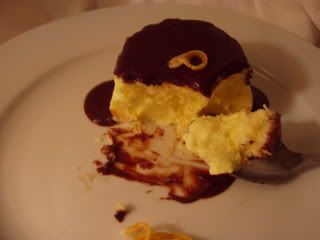
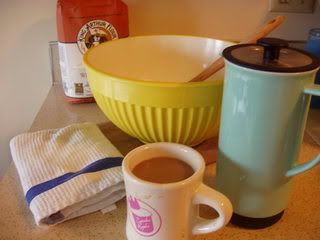
A pot of coffee and a daring baker challenge. My ideal day off

Yeasted delicacies are showing up on blogs everywhere, which can only mean the daring bakers are at it again with Tanna hosting this month's challenge. After October's bostini cream pie, which came in at a whopping 93 grams of fat and almost 1200 calories PER SERVING (thanks again Julius, I can't say that I really wanted to know about that. Sometimes, ignorance really is bliss), myself and several other db's had our fingers crossed for something savory, and perhaps something we could eat a serving of without having to go buy new jeans. Tanna valiantly answered the call with Tender Potato Bread. Those who are carb conscience are rolling their eyes right now because I just said "potato" and "bread." Sorry...it's not my stupid diet. I for one, was ecstatic. Tanna was giving us creative freedom with this. She provided the recipe for the dough, advised that we make a loaf with half of it, and the rest should be used as a canvas to "unleash our inner daring baker." We were allowed to do whatever we wanted with it, so long as it wasn't sweet. Another rule: the dough had to be kneaded by hand. No mixers allowed.

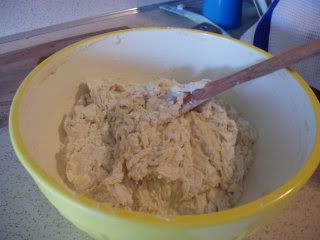
As the db's started making this challenge and posting their results on our private blog, the overwhelming majority warned that this was a really sticky dough.
I consider myself to be pretty comfortable with bread making. I am by no means an expert, but running the wholesale bakery forced me to become familiar with it. Cinnamon rolls and hot cross buns were two of my biggest sellers, and I was also asked to make the ciabatta for the dinner theatre that I shared the kitchen with. Ciabatta is one of the stickiest, most difficult to work with breads out there, which is why it is always in that flat rectangular blob shape. I told myself that If I can handle ciabatta, I can handle this. Here's the thing though: I made the ciabatta in an enormous 60 quart mixer, and both the rising and forming was done on a big wooden bench. I'll admit it- the idea of kneading the sticky potato bread on my tiny formica counter top had me nervous. If anything the clean up that would be required was not something I was looking forward to. But, that is the whole idea of these challenges. Step outside your comfort zone. To me, artisan style bread making is not a big deal. Doing it at home without my mixer? SCARY.

Photo Sharing and Video Hosting at Photobucket

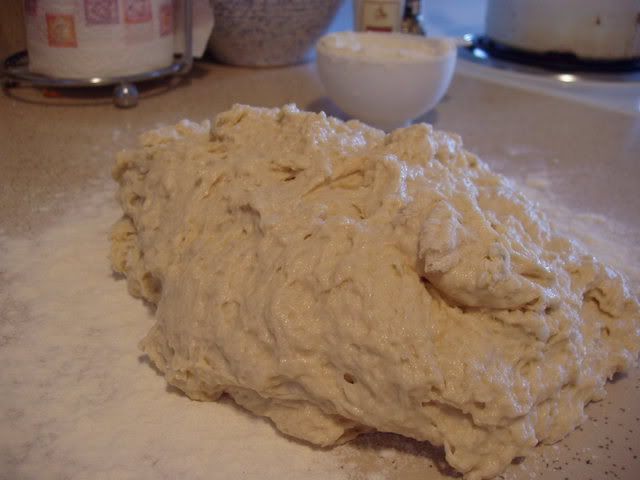
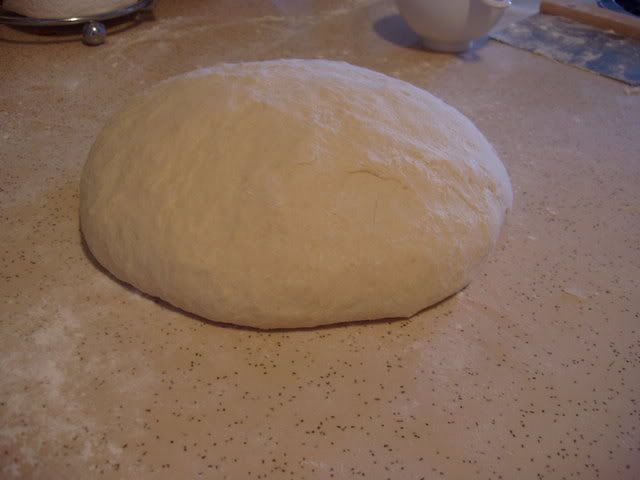
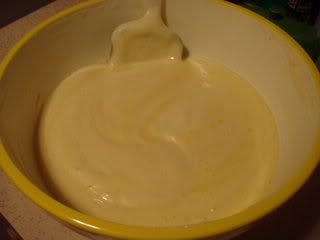
Luckily, Tanna's recipe was really straight forward- and yes, the dough was sticky at first. But once you start kneading, it becomes the most fun thing to play with EVER. Sorry if I am grossing anyone out here, but the texture of the dough can only be described as old lady arm flab. It reminded me of going to visit my great aunt Charlotte and giving her a hug. The dough picks up just enough flour to hold together, but remains very soft and "blubbery."
I have kneaded dough by hand before, but it was not quite as slack as this one. Stiffer dough means your arms tire out quickly. I could have kneaded this dough all day. I forgot how much more satisfying it is to actually feel it come together.
Photo Sharing and Video Hosting at Photobucket
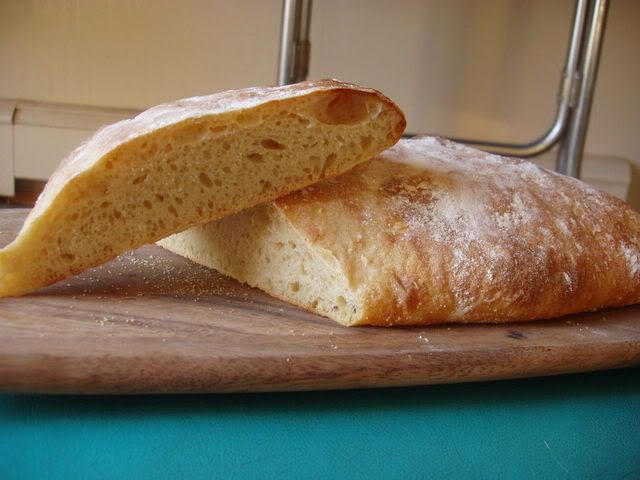
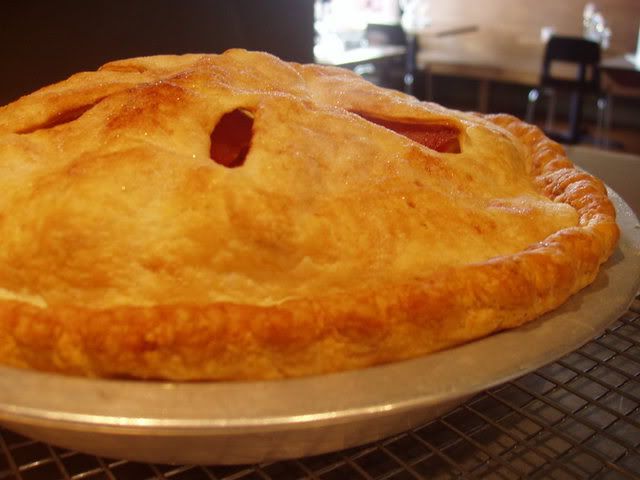
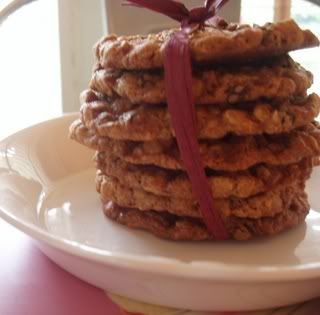
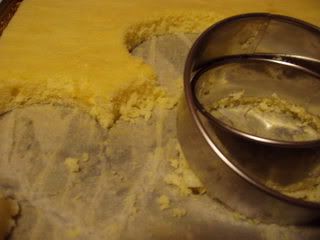
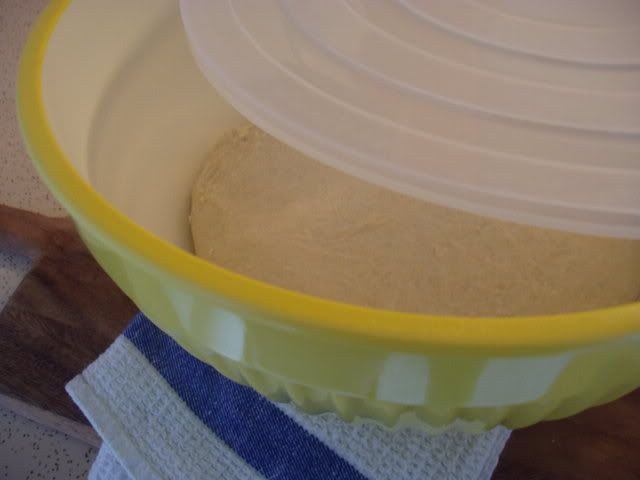
One third of my finished dough became a rustic free form loaf, which I baked right on my pizza stone. The crust was crisp and the inside was tender and fluffy. It was delicious the next day as garlic toast for soup.
Photo Sharing and Video Hosting at Photobucket
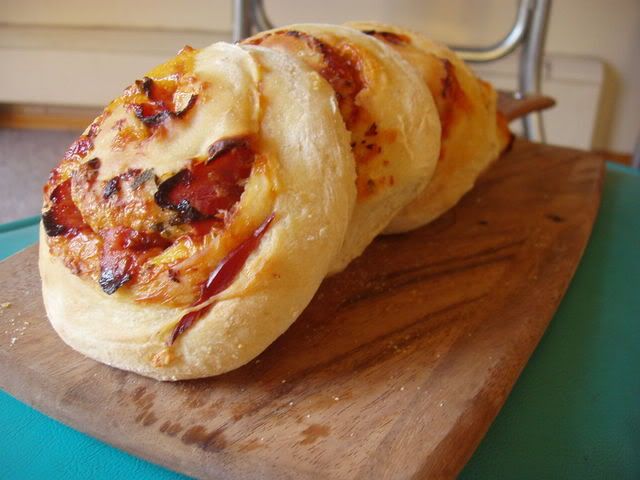
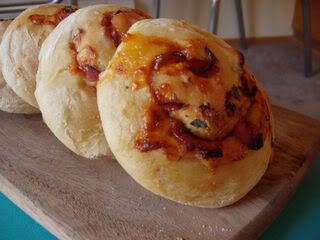
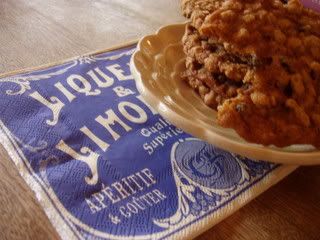
The rest became something that I usually make with plain buttermilk dough: cheddar ham rolls with sage. The dough is rolled out into a rectangle as if you were making cinnamon rolls. Sprinkle with shredded cheddar and chopped sage. Lay out slices of good quality deli ham, then sprinkle with more cheese and sage. Roll it up and slice off medallions. Bake them just like you would a cinnamon roll. We had them for dinner with a salad. How often does a daring baker challenge become two perfectly well rounded dinners? Um, NEVER. Thank you Tanna. This was a great choice after last months heart attack cream pie. If you would like the recipe for Tender Potato Brad, Tanna has it posted on her blog. To see all of the other amazing creations that resulted from this dough, head over to our blogroll. I know that is where I'll be for the next 3 weeks, as there are (last I checked, I'm sure there's more by now) now about 300 daring bakers across the globe!! Thats alotta dough!
Photo Sharing and Video Hosting at Photobucket

Thursday, November 15, 2007

December Royal Foodie Joust!

Photo Sharing and Video Hosting at Photobucket
Mayan Chocolate Boca Negra with Vanilla Bean Ice Cream

Yaaaay! It's jousting time again! This monthly battle of the foodies is hosted by the lovely Jen, also known as the Leftover Queen. It's participants, which include members of Jen's Leftover Queen Forum, are all to create a dish including 3 required ingredients. The winner gets bragging rights, a nifty graphic for their blog, and best of all- picks the 3 ingredients for the next month's joust. Ley of Cilantro and Lime, kicked ass and took names with her paneer, which was created with mushroom, cheese, and herbs as her required props. Ley blessed us with ingredients that both provide a challenge, but go beautifully together: Chocolate, Chiles, and any sort of grain. I heart you Ley, because this means I will get to make one of my all time favorite chocolate treats- baked pudding or "boca negra." It's 1 1/2 tablespoons of flour barely squeeze me into the guidelines.

Photo Sharing and Video Hosting at Photobucket

This dessert is not only really easy to put together, but it is sinfully delicious. I make this when I am looking to impress someone. It may not look like much in the photo, but it's one of those things you need to taste to believe. The texture is fudgy, creamy, and souffle-like. The flavors blend together in perfect harmony- not one of them over powers the other. Instead they all bring out each other's best qualities.
Photo Sharing and Video Hosting at Photobucket
That's not even the best thing about this recipe. Unlike it's cranky cousin, the souffle- boca negra batter can be made in a relaxed state of mind. You can bake off just 2 of them, and refrigerate the batter for another time. It keeps for 2 or 3 days. I'm keeping the rest of mine in the freezer, where it should last for a month. Now, I have a fancy schmancy dessert on hand if I need it. I served mine with some just-churned vanilla ice cream this time, but cinnamon ice cream or whipped creme fraiche are also both deelish.
Mayan Chocolate Boca Negra

12 oz. 70% bittersweet chocolate, chopped- use a good one!
8 oz. unsalted butter, cut into cubes
4 oz. Kahlua
1 cup superfine sugar
1/4 tsp orange zest, very finely chopped
1/2 tsp ground cinnamon
1/4 tsp mild Chile powder
5 eggs at room temp
1/4 tsp salt
1/3 cup sugar
1 1/2 T sifted flour

Photo Sharing and Video Hosting at Photobucket
baking
Preheat oven to 325 and have ready 6 ramekins that will fit into a roasting pan. Spray ramekins with pan spray. Fill the roasting pan with hot water until the cups are halfway submerged. Set aside.
Combine the butter and chocolate in a large bowl. Place over a pot of simmering water to create a bain marie. Stir chocolate and butter occasionally until smooth and completely melted. Set aside.
In a saucepan, stir together the Kahlua and 1 cup sugar until it dissolves. Heat until mixture boils. Whisk into chocolate. Stir in orange zest, cinnamon, and chile.
In a standing mixer, or using egg beaters, whip the eggs, salt, and 1/3 of sugar until very light and fluffy. They should be as thick as soft peak egg whites.
Whisk eggs into chocolate. They will deflate some, but that's ok.
Whisk in the sifted flour. The batter will be of pouring consistency.
Divide batter amongst ramekins and bake for 20-25 minutes. They do not rise, but the tops will be dry to the touch and shiny- like brownies.
Remove from the oven. When cool enough to handle, remove them from the water. Serve warm or at room temperature with ice cream or creme fraiche.
Any excess batter can be stored in the refrigerator and baked off at a later time.

Photo Sharing and Video Hosting at Photobucket
Don't forget to head over to the forums during the first week of December to vote for your favorite!
PS- curious about the title of this dessert? It translates into "black mouth"- which completely describes ones appearance after one bite.

Tuesday, November 13, 2007

Pie #4- Apple Quince: Flavors of the Pacific.....

Photo Sharing and Video Hosting at Photobucket
Asian Pacific quinces team up with Pacific Northwest Apples

You guys didn't think I would hold out on you just before the peak of pie season, did you? You did, didn't you. Oh, ye of little faith, I know it's been a while since The Pie Lady has defended her title, but I would never abandon my readership before the holidays without at least a couple of pies for inspiration.
Photo Sharing and Video Hosting at Photobucket
So, I am presenting you with my all time favorite. This is a bold statement. Choosing my favorite fruit pie is like choosing a favorite pet I've had over my lifespan. They are my babies and all of them are dear to me. You know when I crown a pie "favorite", that something about it is special.
Photo Sharing and Video Hosting at Photobucket
Quinces can be spotted on many food blogs these days, and this is likely not to be the only apple quince pie you've seen. I can tell you that this one has been tested time and time again, and has a surprising taste. The quince is native to Asia and is related to both apples and pears. It's really fragrant and if uncooked, horribly bitter. After about 30 minutes cooking time, the bitterness dissipates and the floral and honey notes that are in the fragrance of the fruit come out it it's flavor as well. As a lucky bonus, the fruit also turns a gorgeous pink color and leaves behind a rosy, full flavored syrup....cocktails anyone?
Photo Sharing and Video Hosting at Photobucket

The Asian quince will be crossing the pond...or Pacific Ocean, to the Pacific Northwest to snuggle up with some Washington apples. They packed a little treat in their carry on. Chinese 5 spice (which is a blend of cinnamon, anise seed, cloves, ginger, and fennel seed)-a staple in Asian cooking, separates this pie from all of the others in my arsenal. It wakes up the apples and fits right in with the quince, joining both fruits together in holy pie matrimony. Never, has a spice, so made a pie.
Photo Sharing and Video Hosting at Photobucket

The choice of which apples to use in a pie is a controversial one, so I'll leave that up to you. It should, however be a blend of 2 apples. One should be tart and firm- I use granny smiths, and the other should be sweet and tend to soften more when cooked-I like Braeburns. They don't turn to complete mush and have a full, sweet flavor. The quinces must be poached ahead of time. They are a much firmer fruit than apples so by the time they are cooked, the apples have turned to sauce. Blegh. The good thing about poaching the quince first, is that once they are done cooking in the syrup, they will not continue to cook in the oven. I love the control that gives me. It makes me drunk with power...or maybe thats my quincemopolitan (see below). Another reason pre poaching is the bees knees: sadly, when quince is baked raw under dough, the don't turn that beautiful blush color. They just kind of look like apples. Pre poaching pumps up the color.
Photo Sharing and Video Hosting at Photobucket
Raw Quince
Photo Sharing and Video Hosting at Photobucket
Poached Quince

Apple Quince Pie
1# sweet apples (such as braeburn, jonagolds, or Macintosh)
2# tart apples (such as granny smith or newton pippen)
poached quince* drained (save the syrup!)
2 T quince poaching liquid*
2 T fresh lemon juice
1/3 cup sugar
pinch sea salt
3/4 tsp good quality Chinese 5 spice
2 T cold unsalted butter
enough of your favorite pie dough for a double crust 10" pie
(Follow this link for my all butter pie dough)
Photo Sharing and Video Hosting at Photobucket
Peel, core, and slice the apples. Toss with the lemon juice and the poaching liquid. Add poached quince and stir gently to combine. In a separate bowl, whisk together the sugar, salt, and 5 spice. Add to fruit and toss to combine. Mound fruit into a dough lined pie plate and dot with butter. Moisten the overhang with water and apply the top crust. Seal the edges, trim excess overhang, and form into a crimped pattern. Slice a few steam vents in the top and sprinkle with granulated sugar. Bake at 375 for 45 minutes. Rotate, lower heat to 325, and continue baking for 30 minutes.
Photo Sharing and Video Hosting at Photobucket
Poached quince

5 quinces
3 cups water
2 cups sugar
1/2 vanilla bean, split and scraped

Peel, core, and slice the quince. Dissolve the sugar into the water in a pot. Add the vanilla bean and bring to a simmer. Drop in the fruit and let cook on low heat for about 30 minutes. The liquid should be at a constant simmer, and use a plate to keep the fruit submerged. Let cool in the syrup. Drain and reserve the syrup for flavoring the pie and for the cocktail I will show you!

Photo Sharing and Video Hosting at Photobucket

BUT WAIT!! Don't go anywhere!! Why not wash down that tasty pie with a "Quincemopolitan"? Two posts in one my friends, for it is Blog Party time, which is hosted every month by Stephanie of Dispensing Happiness and she has picked Fusion as our theme for November. For this virtual cocktail party, I am taking that pink nectar from the poached Asian quince, and fusing it with a New York cocktail made famous by that one show that I've never seen and don't think I'd like. But, I do like the drink. The bartenders serving them at my sister's wedding party can attest to that...Wow. I drank a lot that night.....they just go down so smooth!
Photo Sharing and Video Hosting at Photobucket
Anyhoo, here ya go. Take this recipe and have a jolly old time. I'll be taking it to the blog party were we will be chasing fusion inspired bite sized appetizers with zany cocktails like this one. Check out the round up on Stephanie's blog on November 17th.

2 1/2 measures good quality vodka
1 measure cointreau
1 measure fresh lime juice
2 measures quince poaching liquid *see above
shake with ice and pour into a chilled martini glass. Garnish with a cherry and a slice of lime.

Friday, November 9, 2007

Sugar High Friday #37: The Beta Carotene Harvest

Photo Sharing and Video Hosting at Photobucket
Sweet Potato Flan with cider reduction, brandy snaps, and glazed pecans
Photo Sharing and Video Hosting at Photobucket

Last month, I barely made the deadline for Sugar High Friday, and now I'm early for November's event. Blogs and blog events can be difficult to keep up on, and I'm still pretty new to the whole thing. The evil pie lady robs me of sleep (I am writing this post at 11:20 pm, which means it will not be done until 1:30 or 2 am- And yes, I do have to work in the morning), and keeps me from doing things like laundry and dusting... But it is just SO DAMN FUN!! And I hate wretched laundry and dusting, so any excuse to avoid such activities will do. Seriously, If it were not for SHF's, Daring Bakers, Retro Recipes, and all the other Internet foodie "parties" like that every month, I would probably get bored to tears with my blog and ditch it. I am so happy to have met such an interesting, talented and kind group of people (cue Aw Track a la "full house": Awwwwwwww). But really, I am.
Sugar High Friday #37 is hosted by the lovely and hilarious Leslie of Definitely Not Martha. Her blog is one of those gems that blends really funny writing with great recipes and photography. If you're unfamiliar with her, follow the link to her page. Now. I'll wait.
Ain't she a hoot?

Anyway, in honor of the upcoming US Thanksgiving, Leslie has chosen beta carotene as the November theme. Desserts using sweet Potatoes, squash (or as several of my family members like to call it "squaRsh"), carrot, etc. are all acceptable entries. So....I'm cheating, well- not cheating, but it's not like I made this recipe once, photographed it and entered it. I actually have been making this recipe every day for the last 4 weeks. It's on my dessert menu. Is that bad? I know, maybe I should have tried something new, but I had been planning on posting it before Thanksgiving anyway and it was just too perfect for this month's SHF's theme.

For it's first 2 weeks on my menu, this dessert was entitled "sweet potato flan", but it wasn't selling and no one could figure out why. All of the servers loved it, so they were pushing it with as much gusto as possible. All of the guests who did order it claimed to be delighted with it. Then, one of the cooks bet me a dollar that if I changed the menu to say "sweet potato creme caramel" it would sell better. Well, he was right. The next day I was out a dollar and completely sold out of flans. They are now one of the top selling desserts on the menu.
People are so weird.
Call it what you want, this stuff has a similar mouth feel to sweet potato pie, but with that nice custardy-eggyness and "self-saucing" caramel that can only come from flan. I'm serving mine with a brandy snap, glazed pecans, and cider reduction- but really, it is still just as tasty and chic when served alone.
Photo Sharing and Video Hosting at Photobucket
Sweet Potato Creme Caramel
makes 6 individual servings

flan base:
2 cups whole milk
1 cup heavy cream
1 cinnamon stick, broken apart
4 grams (about 2 T) whole cardamom, crushed
1/8 tsp each grated nutmeg and clove
1/2 vanilla bean, split and scraped
10 oz. sweet potato puree*
4 eggs
2 egg yolks
1/3 cup granulated sugar
2 T brown sugar
1/4 tsp salt
1 oz. calvados brandy

Combine the milk, cream, vanilla bean, and spices in a sauce pan and bring to a simmer. Cover, remove from heat, and let steep for 2 hours.

Meanwhile, spray 6 ramekins with baking spray. Combine
1 1/2 cups sugar
1/2 cup water
in a pot and cook until amber in color. Be careful- caramel gets hot as hell and will cause some of the yuckiest burns ever. Carefully ladle 1 oz of the caramel into the bottom of each ramekin. Set aside while you finish the custard base.
Photo Sharing and Video Hosting at PhotobucketPhoto Sharing and Video Hosting at Photobucket
In a large bowl, whisk together the eggs, yolks, sweet potato puree, sugars, and salt. Bring the milk mixture to a full boil, then remove from heat and slowly whisk into the egg mixture. Strain the custard and stir in the calvados.
Place the prepared ramekins into a hotel pan and fill with hot water until the cups are halfway submerged. Pour the custard into the ramekins, then cover the whole pan with foil. Bake at 300 degrees for 1 hour to 1 hour 15 minutes, or until set. Remove from water bath and chill at least 2 hours.

At serving time, run the tip of a paring knife around the custards. Place a serving plate on top of the cup, then invert the whole thing onto the plate.

*To make sweet potato puree, roast 4 or 5 sweet potatoes in a hot oven until very soft and beginning to caramelize. When cool enough to handle, peel away the skin and puree the meat of the potato in a food processor until very light and fluffy.

Photo Sharing and Video Hosting at Photobucket

Fall in Seattle...
Photo Sharing and Video Hosting at Photobucket

Tuesday, November 6, 2007

Retro Recipe Challenge #10: Story Book Food

Photo Sharing and Video Hosting at Photobucket
What is the matter with Mary Jane?
She's perfectly well and she hasn't a pain,
And it's lovely rice pudding for dinner again!-
What is the matter with Mary Jane?


A.A Milne
"Rice Pudding"
When We Were Very Young
1924

It's retro recipe time again. This month's host is Naomi from Straight into bed, cakefree and dried and she has chosen a really unique theme- story book food. I love, love, LOVE this theme. Retro food is extremely comforting to me. This is most likely because of the work I do at the restaurant. I'm always trying to think outside the box and come up with really cutting edge desserts (I know, pie is not exactly cutting edge- it's the one "comfort" item on my menu, and it is special it it's own way. Very few "urban bistro" dessert menus in Seattle have the balls to feature a granny's kitchen-style fruit pie.), at home, I like to get down to my roots in the kitchen. After a long day of making gateaus, salt caramel tarts, sweet potato creme caramel, and anise hyssop sorbet- it's nice to come home and soothe my tired self with simple desserts from my childhood.
With Naomi's theme this month, the retro cooking in my kitchen is extra comforting. Not only do I have an excuse to cook something childlike and cozy, but I get to dig through old children's books to find my idea.

On a blustery day, I went to a used book store and found a book of poems called "When We Were Very Young" by A.A. Milne. This was published in 1924- I'd say thats retro enough- and featured a poem about a teddy bear who "however hard he tries, grows tubby without exercise". This would be a little character known as Winnie-the-Poo's first appearance in Milne's writing. Another poem, entitled "rice pudding", jumped out at me as a perfect candidate for this month's RRC. I absolutely adore rice pudding and I have not made it in at least 5 or 6 years. Not to mention, there was a good chance that the hubby might even like it. He loves rice in just about anything, and despite his lack of a sweet tooth, custard and vanilla are two things he will happily devour. So, the opportunity to introduce him to something new was an added bonus to this event.
Photo Sharing and Video Hosting at Photobucket
I wish I could tell you all where I got the recipe for this rice pudding. I have a big binder in my kitchen cupboard with the words "CHEF BRITT" written down the binding in sharpee. The contents of this book are hand-written (sometimes on the back of unopened phone bills dated 2001) recipes in no particular order. This thing is an ungodly mess, but for many years, it has worked for me. These recipes are usually jotted down while I am cooking without a net, given to me by friends, or scribbled down while watching cooking shows.
Now, my binders at work are a different story. I have two. One is for recipes from the current menu. They are divided by each dessert item. Between each tab, my assistant will see every recipe needed for a particular item, right down to the garnishes. The second binder is full of archive recipes and notes from dessert specials I have ran in the past. Everything in both books is typed neatly and inserted into a sheet protector. Since I have to be anal at work. I choose to be messy at home. Ying and the yang, ya know?
This rice pud' comes from the scribbly-sloppy book. I truly cannot remember where it came from. I guess recipes written in chicken scratch with unknown origins are the essence of the RRC. I can tell you that if you do chose to try it, you won't be disappointed. It's creamy and cozy. Trevor loved it and has pre-requested it for the next time he is sick. We ate it while snuggled up under fleece blankies, watching the Simpsons. I don't know that you can get more comforting than that.

Rice Pudding
serves 6-8

6 cups milk
1 cup sugar
1/4 tsp salt
1 vanilla bean
2/3 cup long grain white rice
1 lg egg
2 lg egg yolks
1/2 cup raisins or dried fruit (optional)**I omitted them so that my husband wouldn't freak out**
ground cinnamon and nutmeg for sprinkling

In a heavy bottomed pot, slowly bring the milk, sugar, salt, and split vanilla bean to a boil. Stir in the rice with a fork. Cover and simmer gently, stirring occasionally, until rice is quite tender. About 40 minutes. Remove the vanilla bean; scrape the seeds into the rice mixture and stir in.
Pre heat the oven to 400 degrees. Butter a casserole dish. In a bowl, beat the egg, egg yolks, and remaining milk until combined. Add this mixture and the raisins, if using to the rice and stir to combine. Set the baking dish in a roasting pan and place in the center of the oven. Fill with enough hot water to submerge the dish halfway. Bake for 25 minutes, stir gently to redistribute the rice. Bake for another 25 minutes. Sprinkle the rice pudding with cinnamon and nutmeg. Bake for 25 more minutes (total baking time is about 1 1/4 hours, it varies depending on the size of your dish- do not over bake)
Remove from water bath and cool on a wire rack. Serve lukewarm or chilled.

Photo Sharing and Video Hosting at Photobucket
Thanks again to Naomi for hosting this month. She will have the round up posted on her blog after the holidays.
Photo Sharing and Video Hosting at Photobucket

Monday, October 29, 2007

Apples and Thyme: Oatmeal cookies for Mom

Of all the blog events happening in November- this one was my favorite. Apples and Thyme, which is hosted by The Passionate Palate andvanielje kitchen, is a celebration honoring our Mothers and Grandmothers, and the influence they had over us in the kitchen. Perfect timing for my Mother Kym, who's birthday just happens to be today.
Photo Sharing and Video Hosting at Photobucket
Happy Birthday Mamma!

My grandmother has been mentioned here many times, and she obviously influenced me a lot in the kitchen. But it was mom who really should get credit for inspiring me to become a pastry chef. You see, my mother has a special something inside her. I don't know how, but for as long as I can remember she has been able to make everything she touches beautiful. Be it the home, garden, clothing, jewelry, make-up, hair, etc.- she has a true artists eye and outstanding taste. For over 2 decades, she has been a hair stylist. She used to deal in antiques as a hobby, and now she makes stunning jewelry.
Photo Sharing and Video Hosting at Photobucket
everything in mom's house, right down to the napkins, is beautiful

I am a lot like my mom, personality wise- but have never, ever been good at putting together an outfit. Make-up is a big pain in the ass for me, I don't usually bother. I forget to even put on jewelry. This is the worst part- I have my husband do the home decor.
I did however, inherit Mom's taste for great food. Just like everything else, she could even make recipes prettier. She followed a recipe to the letter the fist time and we'd all like it. Then she would make it again, adding her own sense of style and flair, with scrumptious results. This is how I too, always cook. She has an adventurous palate and was always trying new things. If we didn't like what was put before us at dinner, we were made to take 3 bites. After that, we could gag all we wanted. But rarely was that necessary. It was usually pretty damn good. She also baked with my sister and I. Especially Christmas cookies. I have very warm and fuzzy memories of sugar dough candy canes, butterscotch wreathes, and Jonny Mathis.

Her biggest inspiration on me were the two things she installed into my brain regularly. Number one: Get married because you love the man, not because of his pocketbook (which I did, I love my hard working hubby more than anything). Number two: Go to school to become a pastry chef. This one started around 10th grade, when I had expressed an interest in baking. Rather than pushing the 4 year university thing, as most of my friend's moms were doing, she nurtured my interests and started doing research on local culinary schools. She encouraged it all through high school as my enthusiasm toward the idea kept growing. I now have the coolest job ever, in an incredibly exciting industry.

As I mentioned it's her birthday, so her and my dad are celebrating in New York. I am house sitting for them, which is always an opportunity to cook in a way cooler kitchen than mine in a way cooler house than mine. Today, for mom, I am baking oatmeal cookies, which I will leave for her to snack on when she comes home tomorrow. This is a recipe adapted from another lady who has influenced my career, Sherry Yard.
My mom loves oatmeal. Her oatmeal should be another post of it's own. It's amazing. Thick steel cut oats, slowly cooked and served with the traditional accompaniments. For mom's oats, once the bowl is served, drizzled with milk, and sprinkled with brown sugar (berries and nuts are sometimes in there too), stirring is an absolute no-no. It must be left as is. Just trust me, it's better this way. I wouldn't dream destroying a perfect steamy bowl of oatmeal by swirling my spoon around in there.
Mom, you deserve a big thanks for how happy I am today. You nudged me toward my dreams. I admire you, I respect you, and I LOVE you! Here, have some cookies. You deserve them.
Photo Sharing and Video Hosting at Photobucket

Oatmeal Cookies adapted from Desserts By the Yard by Sherry Yard
1 1/2 cups flour
1 tsp baking soda
7 oz. softened butter
1 cup sugar
1 cup brown sugar
1 1/2 tsp grated nutmeg
3/4 tsp ground cinnamon
2 large eggs
3 cups rolled oats
1 1/2 cup fat raisins*

sift flour and soda together in a bowl and set aside.
Cream the butter until it's lemony yellow- about 2 minutes. Add the sugars and spices. Cream until smooth and lump free- about 2 minutes. Add the eggs, one at a time, scraping down the bowl in between additions. On low speed, add the flour, beating just until it's incorporated. On low speed, mix in the oats and raisins.
Form dough into 2 logs and chill for a minimum of 1 hour**
Once the dough is cold, slice off 1/2 inch rounds of dough. bake for 17-20 minutes in a 350 degree oven
*fat raisins are in her book- basically just raisins plumped with a little white wine, orange juice, rum and sugar. I just used plain currants and had good results.
**Instead of the logs, I scooped the dough a seen in the slide show. This is also mentioned as an option in Sherry's book.


Hanging out at Mom's, baking cookies


A big thank you to our hosts!
Photo Sharing and Video Hosting at Photobucket

East Meets West: The Daring Bakers are at it again...

And this time, I'm playing too!

Photo Sharing and Video Hosting at Photobucket
Bostini Cream Pie

It's official! One of the many reasons why I started this little food blog was to get in on the action with the Daring Bakers. This is a rapidly growing community of baking enthusiasts who meet up via the blogospere to partake in a monthly baking challenge. Created in November of 2006 by Ivonne of Cream Puffs In Venice, and Lis of La Mia Cucina, these guys and gals have tackled everything from Strawberry Mirror Cake (involving components such as Bavarian cream, sponge cake, and gelatin) to the doozy of them all: Gateau St. Honore. Also known as "The Patron Saint of Bakers", this dessert in his honor involves puff dough, pate a choux, pastry cream, and caramel sugar work to boot. All of which are some of the most difficult skills to master. Especially from the home kitchen. I've watched in awe from the sidelines, amazed that the majority these talented people don't do this for a living. Last month, after drooling over the milk chocolate caramel tart they conquered, I knew I wanted to play.

I waited all month in anticipation of what our October challenge would be. The ants can now leave my pants. This month's event, hosted by Mary at Alpineberry, is a Boston classic, updated by the San Fransisco Restaurant scene. "Bostini Cream Pie" is a similar idea to the Boston Cream Pie, but sexed up a little. Rather than the standard issue vanilla sponge cake, filled with standard issue vanilla pastry cream, and finished with ganache; the bostini version is an individual dessert of orange chiffon cake nesting atop a layer of vanilla bean custard. Each portion is glazed a la minute with warm bittersweet chocolate. I knew right off the bat that this dessert and I would get along famously. Chocolate and orange is such a heavenly combination, and I love a good eggy custard.
Photo Sharing and Video Hosting at Photobucket

The actual recipe required that we first make the custard and pour it into ramekins. We were then supposed to bake the chiffon cake in ramekins that were the same size as our custard cups. This way we would have an individual cake to unmold and place inside the ramekin of custard, then pour chocolate over it. It was meant to be served inside the ramekin. Confused yet? This seemed like a very silly way to go about putting this dessert together. For one thing, I don't have the 16 ramekins required for this recipe sitting in my cupboard. I was convinced the procedure could be tweaked and I was right. The custard is basically a pastry cream, which will hold up on it's own if it's properly cooked. And why not just bake the chiffon cake in a sheet pan and use cookie cutters to punch out the desired size? This was a recipe from a very well reputed San Fransisco restaurant, but sometimes the way things are done in professional kitchens are not prudent for the home.
Photo Sharing and Video Hosting at Photobucket
Armed with ring molds, parchment paper strips, and refrigerator space, I went about making the custard. The recipe for this is pretty straight forward. I ladled the cooked pastry cream into the parchment lined ring molds and refrigerated them overnight. The chiffon cake was also easy to put together, and delicious! Once the cake was cooled, I cut out adequately sized rounds and placed them over the chilled pastry cream. Once the glaze was cooked (no problems there either), it was time to unmold. I slipped off the ring, peeled away the parchment and poured the warm chocolate over the whole thing (side note: the sight of warm chocolate cascading down a piece of cake is the hottest thing ever. It kind of turns me on).
Photo Sharing and Video Hosting at Photobucket
The verdict? Pretty darn good. The custard itself was just too rich for me. I'm used to pastry cream made with all milk. This was mostly cream. A few bites were all the hubby and I could get through with out feeling sick. The chiffon was my favorite. It has lots of orange juice and zest, adding tons of flavor to a normally somewhat dull cake. And the chocolate? You just can't go wrong with good bittersweet chocolate (I used Scharffenberger- a San Fransisco treat) and butter. It was as good as it sounds. I would make this again, but for the sake of my ever growing bum, I would make an all milk pastry cream. Other daring bakers have substituted the orange in the cake for things like coconut milk and raspberry puree, which also sound delicious. speaking of other daring bakers, check out their versions of the bostini, you will be impressed, I promise...these people have chops!
Photo Sharing and Video Hosting at Photobucket
For the recipe for Bostini Cream Pie, head over to Mary's blog


Thanks Norm!