Monday, September 24, 2007

The October Royal Foodie Joust!

Photo Sharing and Video Hosting at Photobucket
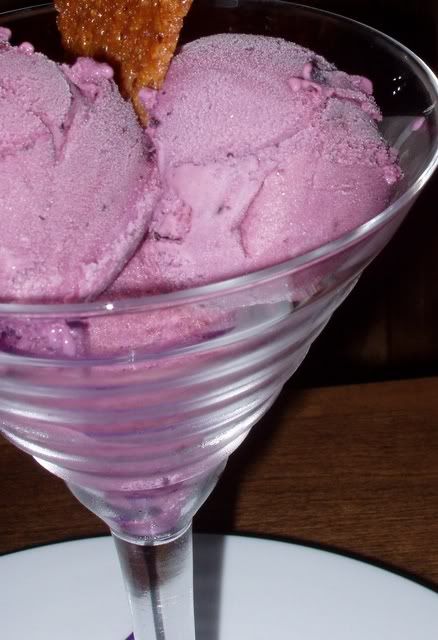
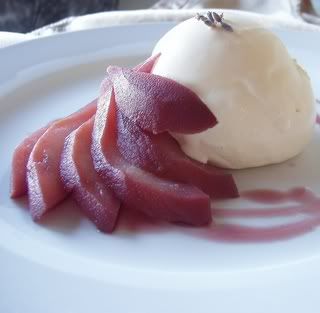
My entry: White chocolate-lavender ice cream with merlot poached pears
Every month, Jenn, the lovely leftover queen hosts a Royal Food Joust over on the leftover queen forums. Whoever wins the challenge from the previous month, gets to pick the three ingredients for the next challenge. Everyone comes up with a dish including all three of these ingredients. Congrats to Meghan, who won lasts month's challenge of chipotle, buttermilk, and zucchini with her zucchini stuffed chicken breasts with buttermilk chipotle sauce. She chose white chocolate, lavender, and pears for this month's joust. Head on over to the forums to see every one's scrumptious entries and vote for your favorite!

At first, I had a hard time coming up with what I wanted to do with this. I was eager to participate because I really don't like white chocolate. Coming up with a dessert showcasing it, that I would actually eat is just the type of challenge I'm up for. I knew this could be done- when one handles the White chocolate delicately and pairs it with the right flavors, it can be pretty delicious. Lavender was a merciful addition on Meghan's behalf. It is one of those things that just belongs with white chocolate. It cuts the sweetness and adds a deeper, more complex flavor to it. Had she not included it in the ingredients, I would have thrown it in there anyway. It was the pears that were stumping me. They are a great choice this time of year, but with white chocolate? Hmmmmm......

After some head scratching, I decided on a mildly flavored white chocolate lavender ice cream served with a side of spicy merlot poached pears. I am pleased to announce that the pears work beautifully with the ice cream. The contrast of the strong flavored, peppery pears against the creamy and cooling ice cream is a winner. Great picks Meghan!


White Chocolate Lavender Ice cream- makes about 4 cups

2 cups heavy cream
1 cup whole milk
1 tsp culinary lavender buds, crushed slightly
5 oz. white chocolate
5 egg yolks
2/3 cup sugar
pinch sea salt

Bring the cream, milk, and lavender to a boil. Turn off heat, cover, and let sit for 30 minutes. Meanwhile, chop up the white chocolate and place in a small bowl. In a separate, larger bowl, whisk together the sugar, salt, and egg yolks. Once 30 minutes is up, bring the lavender infused dairy back to a boil. Ladle about 6 oz. of the hot dairy over the chopped white chocolate. Pour about 6 more oz. over the eggs, whisking them constantly. Pour the now tempered eggs into the pot with the rest of the dairy, and cook over med-low heat, stirring constantly wit a heat tempered spatula. Make sure the spatula never leaves the bottom of the pot, or the eggs will curdle. Once the custard base is thickened enough to coat the back of a wooden spoon, strain it into a fine mesh sieve into a bowl. Stir the white chocolate-cream mixture until mostly smooth. Pour mixture into the custard and stir to combine. Nest the custard in a larger bowl filled with ice cubes and water. Once the custard is completely cold, churn it in an ice cream maker following the manufacturer's instructions.

Poached Pears

2 cups decent merlot. (nothing too expensive, but you want it to be something you'd be willing to drink on it's own)
3/4 cup orange juice
1/2 cup sugar
1 fresh bay leaf
3 peppercorns
1/4 of cinnamon stick, crushed
1/4 of a vanilla bean, split and scraped

2 bartlett pears, ripe but still firm

Peel and cut the pears into quarters. Place them in acidulated water while you combine the rest of the ingredients in a large pot. Bring to a full boil, then drop in the pears and turn off the heat. Use a tea towel or smaller pot lid to submerge the pears in the liquid, or they will not poach correctly. Let sit until the pears are tender to a paring knife. Transfer pears and liquid to a shallow pan and refrigerate.

To serve

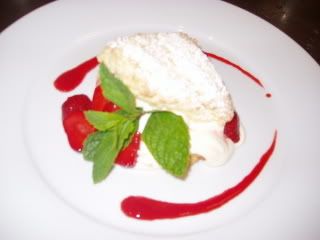
Put 4 plates in the freezer. Drain pears on paper towels while reducing the poaching liquid until syrupy.
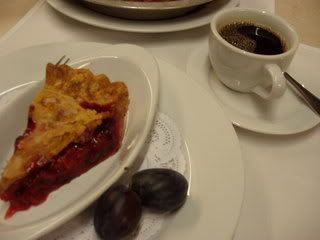
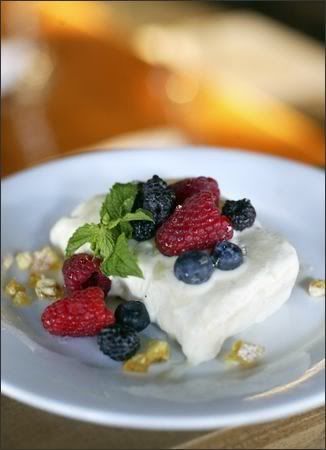
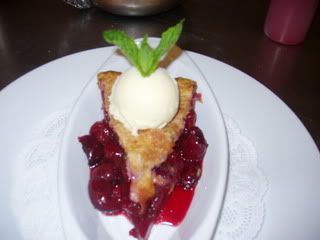
Drizzle the reduced liquid on the frozen plates. Place a big scoop of the ice cream over the liquid and fan out pear slices around it. Garnish with lavender buds (though I didn't have much! My plant is suffering in the cold!)

Photo Sharing and Video Hosting at Photobucket

Sunday, September 23, 2007

Pie #3: Tom Thumb's Plum

Photo Sharing and Video Hosting at Photobucket
The fact that Adam asked me if I had ever made plum pie on the exact same day that Frank dropped by to give me 20# of Italian plums from his tree is one of those serendipitous coincidences that one is rarely blessed with. Adam didn't know that Frank was coming, and Frank wasn't sure if I could use the plums. It was luck and good timing that led me to coming up with this pie, which knocked my socks off the second I tasted it.
Adam, the sous chef at the restaurant is one of my favorite guys to bounce ideas off of. He's a great chef who grew up on a farm in Michigan. His knowledge of produce is extensive, and being that he's not a northwest native, things like wild mushrooms, seafood, and huckleberries get him all giddy. It's a joy to work around. We were discussing the Italian plum, which at the moment, are hanging impatiently from neighborhood trees all over Seattle, when he brought up that nursery rhyme....the one with Tom Thumb. Neither of us could really remember much about the story. Only that it involved a plum pie, and something to do perhaps with Tom sticking his thumb in it? Anyway, I had never made a plum pie, nor even seen a recipe for one. About an hour later, Frank, our resident green thumb showed up at the back door in his overalls...always a good sign. That means he's been picking and I get to reap the benefits of his labor!! Frank made my day with six baskets of beautiful Italian plums. Right away, I got crackin' on that pie.

I wanted to really focus on the flavor of the fruit...as I always do with pie. I'm not big on blended fruit pies, or pies with busy fillings. For me, pie is a way to showcase a particular fruit in the height of it's season. I try not to go overboard with spices or sugar either. Perfectly ripe fruit needs very little embellishment. When one takes a bite, the first thought in their head should be "Peaches!" or "Cherries!", not "Sweet! and nutmeg...and I think I taste blackberries too". That being said, most fruit pies need just a little something to pump up the flavor. My blueberry pie has a little ground ginger in it. Not so much that it's over powering, but just enough to enhance the berries and bring them alive on your palate. In the case of Italian plums, I turned to two flavors that attach beautifully to them; a splash of Armagnac and just a pinch of cinnamon.

Photo Sharing and Video Hosting at Photobucket
The Italian plum's soul mate....

Plum Pie

1 recipe of your favorite pie dough (or see the cherry pie post below), must be enough dough for a double crust pie
3# Italian plums
2 T fresh lemon juice
1 oz. Armagnac or brandy (optional, but recommended!)
2/3 cup granulated sugar
1/2 tsp cinnamon
pinch sea salt
1/3 cup cornstarch
2 T cold unsalted butter

Wash the plums well, then pit and slice into quarters. Toss with the lemon juice and Armagnac. In a separate small bowl, whisk together the dry ingredients and stir into the plums. Let the fruit sit while you roll out the bottom crust. Fill the crust with the fruit, then cut the butter into small cubes and scatter them across the fruit. Roll out the top crust, place it over the fruit, and adhere it to the bottom crust. Trim the edges, tuck them under, then form into a crimped patters. Slice a few steam vents on top of the pie, then sprinkle with more granulated sugar. Bake at 375 degrees for 45 minutes. Turn heat down to 325 and bake for 1 hour.


I think this has inched it's way to the top of my list of favorite pies. The cinnamon is just right...barely there, but still doing it's job. I doubt many tasters could detect the Armagnac, but they wonder what it is that gives the pie that delightful warmth. I have now found a new way to celebrate fall's arrival, thanks to a man dedicated to harvesting his fruit trees before the birds do it first, and a nursery rhyme.
Photo Sharing and Video Hosting at Photobucket

Jonny Loser's Cheesy Goodness

One of my sister's oldest friends, Jon (aka- Jonny Loser) works in the realistate biz, but the guy should be a chef. He's got the crass sense of humor that is encouraged in kitchens and he's a natural with food.
A few weekends ago, My sister Brooke and Jon threw themselves a double birthday party/BBQ with the two of them cooking. Brooke made a bright corn and tomato salad and baked beans (probably something else too, but I have forgotten what...sorry B). Jon did all the grilling...burgers and ribs so succulent that they didn't even need his BBQ sauce....but the sauce was incredible, so I dowsed them in it. We were all nibbling and chatting outside, when Jon brought out an unexpected surprise from the kitchen. His homemade macaroni and cheese. When I saw the bubbling casserole dish hit the picnic table, I immediately dumped the contents of my plate onto Trevor's so I could make room for the mac. It was probably the best homemade macaroni and cheese I have ever had. Fancy restaurants like Icon and Veil are putting mac n cheese on their Menus these days, but they are always a little too "dressed up" for me. This one was simple and perfect. That's about the best way I can describe it. Just perfect.

Trevor loved it too, so I had Jon email me the recipe. It's also the funniest recipe for anything that I have ever received. Here it is- warning: this is uncensored!

Hi Brittany,

Here is the mac & cheese recipe

Paprika
4 Tbsp butter
4 Tbsp flour
Milk
Cheese ( I like to use Tillamook sharp or extra sharp cheddar)
1/2 - 3/4 cup grated Parmesan
1 box of shell noodles (I like to use large shells, but always have to settle for medium)

Take knife and cube up 2/3 - 3/4 of the baby loaf of cheeeeese. Eat some of it cause it's good.

Boil water and put noodles in water once the water boils. Don't put your hand in the boiling water. That sucks.

Make a roux with the butter & flour.

Pour in the milk. I don't really know how much. Probably 2 or 3 cups.

Now you stir it on med-hi heat. Never stop stirring. Stir stir stir. If you stop stirring, it won't be as good. I'm not even kidding. I don't know why, but after years of research we have always found this to be the case.

Once it becomes nice and thick, start to drop in the cheese. But don't stop stirring, ok? Just keep it fucking going.

Once the cheese has all melted into the roux making it look like something you want to eat with a spoon, pour it over the boiled noodles that you managed to put into a casserole baking dish without stopping the stirring.

Then pour the Parmesan cheese into it and mix it all up and around so the shells get filled with cheesy happiness.

Then sprinkle some paprika over the top of it. Then bake it in the oven for like 30 minutes at about 400 degrees, or until you've reached your desired levels of crispiness.

Then you take it out of the oven and let it cool a little. Then you eat it with your mouth and teeth and stuff. Chomp chomp chomp.

Photo Sharing and Video Hosting at Photobucket
Some of us are defiantly used to recipes that are a little more precise. But it seemed to work perfectly for me. I used Tillamook extra sharp cheddar as Jon suggests. I think I ended up using about 7 oz. Taste your sauce as you near the end of cooking it. Throw in a little more cheddar if it needs it, but don't forget that you're about to add Parmesan too. What I think is critical is finding the large shell pasta, which shouldn't be a problem at most grocery stores. With our mouths full, Trev and I agreed that if we were forced to use the medium shell pasta, it wouldn't be quite as good.

You won't see a lot of savory posts on this blog, but I'll throw one in here and there for variety. You'll never see uptight or fancy food. It's just not what I cook at home. If I want duck breast with bing cherries and chicken morel balletone. I go out. If I want macaroni and cheese made with love and elbow grease, I stay in!

Photo Sharing and Video Hosting at Photobucket
All my mise-en-place, complete with a cold beer for the cook!

Photo Sharing and Video Hosting at Photobucket
He means it. Don't even think of "giving your arm a break"- stir, wuss!

Photo Sharing and Video Hosting at Photobucket
Before it's 30 minutes in a 400 degree oven
Photo Sharing and Video Hosting at Photobucket
...and after.

Thursday, September 20, 2007

Huckleberry Ice Cream

Photo Sharing and Video Hosting at Photobucket

What you see is one of the many reasons why I love my home. I was born and raised in the Seattle area and the Pacific Northwest is part of who I am. Fresh seafood, wild mushrooms, bad weather, coffee, Jimi Hendrix....I love it all and I doubt I'll ever move. Huckleberries (also known as bilberries), in particular hold a special place in my heart. These little guys are kind of hard to find. "Loved by bears and humans alike", they grow in the mountains around Idaho, Oregon, and Washington. It used to be that one could only find them in the most random places... gas stations in the middle of eastern Washington would have a man selling them from the back of his truck. Thanks to the growing popularity of neighborhood farmer's markets and local mushroom purveyors, I can get fifteen to twenty pounds of them dropped off at the restaurant per week- all cleaned and ready to go. They freeze beautifully, so if you can ever get your hands on them, buy a lot. Then, place them in a single layer on a sheet pan and put them in the freezer. When they're frozen, pack them up into heavy duty ziplock bags, and you've got huckleberries ready to go at any time of the year. They thaw in an instant and are great tossed into a coffeecake batter, baked in a bundle of puff dough, sprinkled over oatmeal, or my absolute favorite: huckleberry ice cream.
Photo Sharing and Video Hosting at Photobucket
Nothing could be easier than putting this luscious treat together. If you are comfortable with making vanilla ice cream, this will be a breeze. The huckleberries are combined with just a pinch of sugar, cooked down into a chunky sauce, then cooled and combined with an ice cream custard base. The finished product is a creamy mauve colored delight. The berries look like blueberries, but really don't taste like them. They are somehow both tangier and sweeter at the same time. I like to serve this dessert as simply as possible. Just an oatmeal crisp cookie plunged into the ice cream, and a few little nibbles on the plate such as candied orange peel and glazed pecans.

Huckleberry Compote

1 1/2 cups huckleberries, fresh or frozen
3 Tbl. sugar
3 oz. water
1/2 tsp. fresh lemon juice

Combine the first three ingredients in a sauce pan and cook over medium heat for about 10 minutes. Whisk the sauce a few times during the cooking process to break up the berries slightly. Stir in the lemon juice. Cool the compote completely before combining with the ice cream custard.
Photo Sharing and Video Hosting at Photobucket
Vanilla Ice Cream base

2 cups heavy cream
1 cup whole milk
6 egg yolks
pinch salt
2/3 cup sugar
1/4 of a vanilla bean or 1/2 tsp pure vanilla extract

In a large mixing bowl, whisk together the egg yolks, sugar, and salt. Set aside. Split the vanilla pod down the middle and scrape the seeds with the tip of a paring knife into a saucepan. Drop the whole pod into the pan and add the milk and cream. Bring the mixture to a full boil, then temper in about 1/3 of the hot liquid into the yolks. Whisk well, then pour the hot cream/yolk mixture back into the pan. Return to medium heat and cook, stirring constantly with a heat resistant spatula. Be sure the spatula is continuously touching the bottom of the pan, or the eggs Will scramble. The ice cream base is finished once the custard is thick enough to coat the back of a spoon or it registers at 170 degrees on a thermometer. Strain the custard through a fine mesh sieve, then allow to cool in an ice bath. It's best to refrigerate the base overnight if you can. If you're not using the vanilla bean, the extract can be stirred in at this point.

Once both your ice cream base and huckleberry compote are cold, combine them and churn in an ice cream maker following the manufacturers instructions.
Photo Sharing and Video Hosting at Photobucket

Wednesday, September 19, 2007

Everbearing strawberries......one last goodbye

Photo Sharing and Video Hosting at Photobucket


It's suddenly fall here in Seattle. It's been raining all week and the breeze has a chilly sting to it...though I am surrounded by ovens, I froze my butt off at work today. That's fine by me- fall is beautiful here in the Pacific Northwest. All the cool apple varieties are showing up in the farmer's markets, as well as squashes, huckleberries, pears, and plums. This is my absolute favorite time of year to cook and bake. Spending a cold day in a warm kitchen, steaming up the windows with goodies from the oven soothes my soul. Having said that, this time of year there is a little surprise that awaits those who disdain the cold season. One last chance to savor the delights of what the summer's sun helped produce. The everbearing strawberry. These little lovelies are available in the late summer for just a few weeks. I always try to pick up as many as I can. A few weeks ago, I made freezer jam with the everbearing strawberry, thinking that was my last chance. Thanks to a brief late summer heat wave (that came to an abrupt halt last Friday), I was able to get my hands on one more flat. All I wanted to do with them was make strawberry shortcake. This is a dessert that I made so much of in June, that I thought I could not stand the sight of it anymore this year. At the restaurant, it was all anyone ordered. I was cleaning, hulling, and slicing strawberries for at least an hour each day to keep up with demand. My fingers were permanently stained for two months. It was the bain of my existence. Well, after having it out of my life for a few months, I suddenly missed it terribly. I needed closure. One last goodbye to summer and the exquisite Washington strawberry.

I make a fluffy buttermilk scone rather than a traditional cream biscuit. I prefer the sturdier, tangier results you get from using buttermilk. It's a wonderful counterpart to the sweet berries and rich cream. Whipped cream or creme fraiche are the obvious choices for a filling, but I went a step further and made a batch of lemon curd, then folded in whipped cream. The lemon doesn't interfere with the strawberries, it just adds a little more depth to the filling, which can often times be too sweet for my tastes.
Photo Sharing and Video Hosting at Photobucket


Prepping the strawberries is just a matter of slicing up only the most beautiful berries of the bunch and dusting them with a little granulated sugar. After a minute or two, the sugar dissolves and gives the berries a beautiful, shiny glazed look. The less than attractive, yet full on flavor berries are pureed with a few spoonfuls of simple syrup for a vibrant strawberry coulis to make the plate extra sexy. A little fresh mint and a shake of powdered sugar and ta-da! A dessert that will help you to properly bid summer 2007 adieu.
Photo Sharing and Video Hosting at Photobucket

Buttermilk Scones (serves 16)

16 servings of strawberry shortcake is probably much more than will be needed. I recommend making the full batch of scones anyway and having them for breakfast with jam.

4 cups pastry flour
3/4 cup granulated sugar, plus more for sprinkling
1/2 tsp sea salt
1/2 tsp baking soda
4 tsp baking powder
6 oz. good quality(such as Plugra) unsalted butter, cold and cut into 1/2" cubes
1 egg
1 tsp pure vanilla extract (if you don't have the real stuff, just omit it)
1 1/2 cups buttermilk

Pre heat oven to 375 degrees. In a measuring pitcher, whisk together the egg, vanilla, and buttermilk. Put it in the fridge while making the dry mix.
In the bowl of a food processor, combine the dry ingredients. Add the cold butter and pulse briefly until the mixture is crumbly. Dump the crumbs into a large mixing bowl. Make a well in the center and pour in the buttermilk-egg mixture. Mix gently with your hand or a wooden spoon until a loose ball is formed. Turn the dough out onto a floured surface and gently pat into a long, narrow rectangle. Cut the rectangle into 8 squares. Then, cut each square diagonally so you have 16 scones. Sprinkle each one with granulated sugar. Bake on a parchment lined sheet pan for approximately 15-20 minutes, or until the scones are golden brown and firm to the touch. Cool, then split down the middle are fill with berries and cream
.

Tuesday, September 11, 2007

A Summer Delight: Thistle honey semifreddo

I stumbled upon a recipe for honey semifreddo a year or two ago while flipping through Nigella Lawson's "Forvever Summer." At that time, I was running the wholesale bakery. Scones, pies (of course), cinnamon rolls, scones, some layer cakes, and more scones were all I was ever making at work. As one might guess, I was going out of my mind with boredom. Thankfully, in March of this year, I shifted gears and am now making dessert for a local urban bistro. The job is perfect for both my tastes and attitude toward food. When planning out my dessert menu, I knew I would have to start playing with that semifreddo of Nigella's.

The first place I would have to start would be finding a great, full bodied honey. I wanted something dark with an intense, yet not too smokey honey flavor. At the same time, it needed to be a honey that wouldn't break the bank and was easy to get my hands on. Tahuya River Honey is my favorite honey in this area, but I've only ever seen it at farmer's markets and the price is just a little high. Each loaf pan of the semifreddo calls for almost 8 oz. of honey- practically a whole jar.

I happened to be having lunch near Pike Place Market with my mom one day, when she mentioned that she needed some dried chukar cherries for her manhattans. I tagged along and stopped by the Snoqualmie Valley honey stand. http://www.honeyexpress.com/ Somehow, I had forgotten about these guys. They hold a regular stand at Pike Place, so it's easy to get. (They will also ship!) Requirement #1 met. Three pound jars of all varieties of their honey is only $15.00. Requirement #2 met. So I started tasting some of them. Firweed was delicious as it always is, but I was looking for something slightly less smokey. Buckwheat honey was also great, but a little too sharp. Thistle honey was exactly what I was looking for. Dark, intense, and complex. We have found a winner!
Photo Sharing and Video Hosting at Photobucket
Ready for it's close up...topped with black raspberries, tayberries, blueberries, and pine nut praline.
Photo courtesy of the Seattle P-I

Next, it was time to start adjusting Nigella's recipe to suit the vision in my head. Her's is a little eggier than what I had wanted and the final product is coated with a thick layer of more honey and toasted pine nuts. My version is slightly creamier, and is served with crunchy pine nut praline. Local berries and a tiny drizzle of honey (thinned out with a little Moscato d'asti) is all this dessert needed for it's finishing touches. Most important: It's totally delicious. I will go back to this dessert annually. It was a hit both with customers and reviewers, and it was easy to keep up on it's prep. Above all, just 4 ingredients is all you need to create this luscious, creamy, and cooling summer dessert.

Thistle honey semifreddo (serves about 12)

7 1/2 oz. thistle honey (or your favorite full-flavored honey)
4 egg yolks
1/2 of a vanilla bean (seeds only)
3 cups heavy cream

line a loaf pan with plastic wrap and set aside. Prepare a double boiler: Fill a sauce pot with about 1" of water and bring to a low simmer. Have ready a bowl that will fit over the pot. The bowl should not be too deep, nor the water level too high.

In the bowl you have ready, combine the honey, vanilla seeds, and egg yolks. Place the bowl over the simmering water and whisk constantly for about five minutes. The mixture will have thickened quite a bit, and will have become pale in color. Remove bowl from bouble boiler and set on the counter to cool to room temperature.

Once the honey mixture has cooled, whip the heavy cream to soft peak. Gently fold the whipped cream into the honey in three additions. Pour the mousse into the prepared loafpan and freeze overnight.

To serve: put a sheet pan in the freezer for a few mintues. When the pan is good and cold, remove it and flip it upside down on your counter. Now you have a nice cold surface in which to slice the semifreddo. Invert the loafpan onto the cold sheet and gently seperate the plastic wrap from the loaf. Slice into 1 " slices and serve immediatley on chilled plates. OR- Place each slice onto a chilled sheetpan, wrap in plastic, and freeze until ready to serve.

Tuesday, September 4, 2007

Pie #2: Bing Cherry a la Brittany

Why is it that sour cherries, sometimes called "pie cherries" have reigned supreme in cherry pie recipes? I've never understood that. Sour cherry pie is delicious, to be sure. But when I make cherry pie, it's always with bing cherries. When baking with bings, the sugar can be greatly reduced. Therefore, when you taste the pie, the flavor of the cherry is so pronounced that it practically socks you in the face...in a good way. In the height of their season, bing cherries can be as cheap as 1$ a pound in this area- pies are a great way to take advantage of their cruely brief time at that price.

Tackling the task of pitting the bing cherries for this pie is an effort well worth making. In the pastry kitchen, we liken this to the mind numbing chore of shelling fava beans or de-veining shrimp. Commercial cherry pitters will cut your prep time in half. Decent handheld pitters can be picked up for less than $20.00. However, if you don't want to spend the money for yet another gadget, don't let that discourage you from making this pie. Grab a friend, a couple of paring knives and make it a team effort. Like shelling fava beans, this is the perfect job to do sitting on the porch, dishing with a pal. Just remember to wear your grubbies, bing cherry juice will splatter everywhere, including your clothes.

Photo Sharing and Video Hosting at Photobucket
My fancy cherry pitter....40 bucks at sur la table, and totally worth it

Photo Sharing and Video Hosting at Photobucket
Hot form the oven, with a melty scoop of toasted almond ice cream

PIE DOUGH:
Use a good quality butter for this, you will thank yourself later. I like Plugra, a European style butter which can be found at Trader Joe's. This recipe will leave you with plenty of extra dough.

2 cups pastry or all purpose flour
8 oz. cold unsalted butter
1 tsp sea salt (or 3/4 tsp. kosher salt)
5-7 Tb. ice water

Cut your butter into small cubes, and place on a dinner plate. Put the plate in the freezer while you gather the remaining ingredients.
Place the flour and salt in the bowl of a food processor, pulse briefly to combine. Add the butter and pulse until mixture in crumbly and the butter is pea sized (this can also be done in a large bowl with a pastry cutter or two forks).
Add 5 tablespoons of the ice water and pulse just to combine (mixture should still be crumbly!). Grab a handful of the crumbs and squeeze it together with your fist. If the mixture holds together, it's done. If not, add more water, one teaspoon at a time.
Dump the crumbly dough out onto a work surface. Divide it into two piles (one for the top crust and one for the bottom). Press each pile together so you have two discs of dough. Wrap in plastic and refrigerate for 1 hour.


FILLING:
This may seem like a strange method for making a pie filling, but it's necessary to cook a few cups of the cherries with the starch. The pie is still delicious if the pre-cooking process is eliminated (just be sure to omit the water!), however, the juices and starch with fall to the bottom of the pie. This creates a strange gelatinous layer after the pie sits for a while.

4# Bing cherries (weighed before stemming and pitting)
2 Tb. lemon juice
6 oz. water
1/3 cup cornstarch
1/3 cup sugar
pinch salt
1 Tb amaretto (optional)
2 Tb unsalted butter, cut into cubes

Stem and pit the cherries. Save any juices that accumulate.
Whisk the sugar, starch, and salt together in a small bowl and set aside.
In a large pan, bring the water, lemon juice, two cups of the cherries and any juices accumulated during the pitting process to a boil. Add the starch and stir consistently over medium heat for about thirty seconds. Mixture will be very thick and gloppy. Fold in remaining cherries and amaretto if using. Cover surface with plastic and chill until cold.
Spoon filling into the crust and dot with the butter. Cover with the top crust, seal and crimp the edges. Cut a few steam vents on top and sprinkle with granulated sugar. Bake at 425 degrees for thirty minutes, then turn heat down to 350, and continue baking for one hour.

Don't squeeze the jelly bag! The Ballard farmer's market and jam to follow

Have I mentioned that the Ballard Farmer's market is my new favorite thing ever? I will always love the University market, mainly for it's being open all year, but there is something about that Ballard market that makes you feel like you have been swept away from it all. After four or five hours there, I feel like I've been on vacation. Last Sunday, my pal Lesa and I spent the day there wondering around, meeting new people, and tasting all sorts of goodies. We were, however, on a mission. Jam. A while back, Lesa and I were chatting over a bottle of wine, when we revealed to each other that neither of us had ever canned or preserved anything in our lives. My mother made apple butter, freezer jam, and jalapeno jelly when I was a kid. My Mamo has always made strawberry jam (and will always remind me of the flat of freshly picked strawberries she was JUST about to turn into jam, when my mom went into labor with me and she had to drop everything and head for the hospital. Needless to say, they sat on the counter in the hot July sun, never to become the row of ruby red jars that she had hoped for!) The point being, it's ludicrous that I was never tutored in the art of preserving! I love jams, jellies, butters, pickles, and chutneys, but until now, I have always had to rely on the ridiculously over priced jars I would pick up at the grocery store, or the gifts of friends. Those pathetic days are now over.


We began our market trip with a few ideas in mind. Neither of us wanted to do pickles or chutneys just yet. We'll save that for canning/preserving part two. I have been wanting to do the Plum jelly featured in Greg Atkinson's book "Northwest Essentials" for a while now, for one thing it sounded delicious and EASY! Lesa was thinking about preserved peaches. We picked up about 4 pounds of Italian prune plums, as Greg calls for, and some gorgeous red haven peaches. Then, we walked by the "Foraged and Found" stand. HUCKLEBERRIES!!! How could I have forgotten about huckleberries?! Of course, something would need to be done with these. I am a Seattle native. Naturally my love for these northwest berries runs deep. There is no commercial licence for huckleberries, so you will not see them at Safeway. But for the brief late summer months, they are available at farmer's markets, and worth every penny. We picked up a few pounds of them, and headed over to my berry lady. Jessie's Berries is one of my favorite farmer's market stops. She is usually at all the markets. Even the brand new, teeny Queen Anne market. Her black raspberries were the star of a dessert special I ran back in July that people are still talking about. Jessie had some 2nd crop strawberries and this would be essentially the last chance I'd have to savor the washington strawberry. A flat was purchased. I am not sorry. This years second pick of strawberries (also known as the everbearing strawberry) has been better than the first. Next, we stopped for a light lunch and glass of wine at divino, loaded up the car, and headed to Lesa's kitchen. Let the canning games begin!


We started with plum jelly, which takes the longest. Italian plums are split in half, cooked down, placed in a jelly bag (or pillow case-see photograph), juices reduced with sugar and lemon juice, then canned. While the plums cooked down, we tackled the strawberries and huckleberries. Both of us wanted to make freezer jam with these berries, which isn't really canning, but who cares? We both love freezer jam, and I hate to cook strawberries. Something about it depresses me. The huckleberries and strawberries were squished gently with a potato masher, then combined with sugar and pectin. That's all you have to do to create beautiful, delicious jam. Make sure you use plastic containers, and most pectin boxes come with instructions for freezer jam. Next it was time to deal with the peaches. Until we tasted one. It was just too perfectly succulent to peel and can. They needed to be eaten as they were, right then. So, we'll do preserved peaches next time. Meanwhile, our plum juice was dripping from it's pillow case into a bowl....very very slowly. "Don't squeeze the jelly bag!" Lesa would yelp at me everytime I went over to fiddle with it. Greg states very clearly in his recipe...do NOT squeeze the jelly bag. Otherwise the jam will get cloudy. It had been several hours at this point, and we were getting ANTSY! ....We squooze the jelly bag. Naughty, impatient girls. You know what? The jelly turned out to be stunning and not at all cloudy. It was a sparkling garnet color and I think it's my favorite product of the day. The plum flavor is highly pronounced and it has a marvelous texture. I will be making it again this month and saving it for Christmas gifts. Here's a link to Greg Atkinson's homepage, where you'll find his recipe for plum jelly. Spending a beautiful Sunday morning at the market and the afternoon in the kitchen is church for me. I came home that evening feeling high from mastering a new skill. I blabbed to Trevor, who listened politely about all I had learned and the people I had met. Then, we had toast with jam. As he took a bite of buttery white bread, smeared with strawberry jam (something he's usually not a huge fan of), he smiled, then hungrily took another bite. Then, devoured the entire thing. Later that night, he snuck into the kitchen for a PB n J made with the huckleberry. Lesa, I think we done good.


Thanks Norm!