Sunday, March 30, 2008

My favorite vegetable tart for the picky quiche hater

Photobucket

I have to admit that I am not the biggest fan of quiche. I won't go so far as to say that I hate it. I have had some very good quiches in my day- one of the jewels of this city, Le Pichet makes fabulous quiche. They do it right- lots of yummy meats and veggies, a light hand with the custard, and a quality buttery crust. Come to think of it, Le Pichet is pretty much one of the most awesome French restaurants in Seattle and there is little that their tiny kitchen produces that doesn't transport me to Paris with one bite.....actually, I could go for some oeufs plats and chicken liver pate right about now- with that amazing baguette of theirs....mmmmm....
What was I talking about again?
Oh yeah- quiche. And how I don't really like it that much.
So here is my beef with most quiches- they are often way too eggy with a store bought crust which no love was put into at all, and the classic spinach/mushroom/etcetera filling has me yawning at the thought of it.
Now that I have let out my little rant, I will say that I like the idea of quiche and/or a really good quiche (see above Le Pichet love-fest).

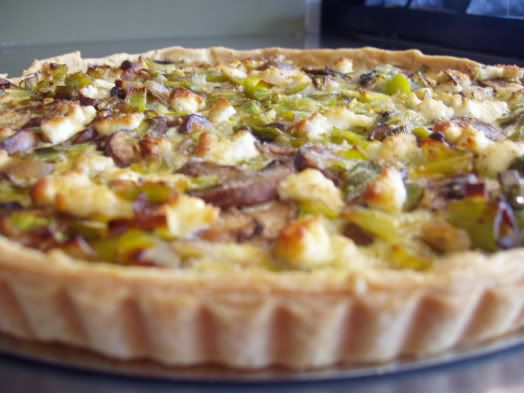
So here is my answer to the doldrums of quiche lorrainesville. A vegetable tart loaded with lots of veggies and just enough custard to hold the thing together.
At work, when I am feeling super nice, I save my scraps from that day's pie, pillage the walk-in for whatever veg is staring back at me, and whip up one of these babies for the boys. Three hungry line cooks will polish off a 12 inch vegetable tart in about 20 minutes... It really is an impressive sight to behold.

I am giving you a "rough outline" recipe here. Really, all you need to know is the custard base. This tart is a canvas for whatever your imagination or your refrigerator has to offer. I have made this recipe with cherry tomatoes, basil, and feta- or asparagus and fontina, or caramelized onions and Roquefort, or wild mushrooms, thyme, and gruyere....the possibilities are endless- and they're making me hungry.
Photobucket

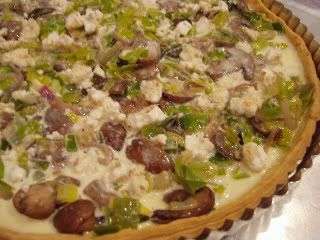
Leek and mushroom tart

3-4 medium leeks, washed thoroughly and sliced (use only the white and pale green part)
3 shallots, sliced
4 oz crimini mushrooms, wiped clean and sliced
butter and olive oil (or flavor infused oil- I used garlic) for sauteing
chopped thyme and chives
2 oz goat cheese
custard base:
2 eggs
1/3 cup half and half
1/3 cup heavy cream
salt and pepper


enough of your favorite pie dough to line a 10-12 inch tart pan (or, try a half recipe of my all butter pie dough)
Photobucket

Step 1-
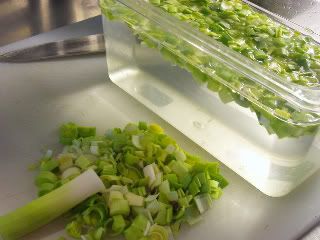
For god's sake WASH your leeks! These innocent little things pack a lot of dirt along with them. Slice em first, then soak them in water. Drain and repeat until clean. Dry the leeks on a tea towel while gathering the rest of your ingredients.
Photobucket

Step 2-
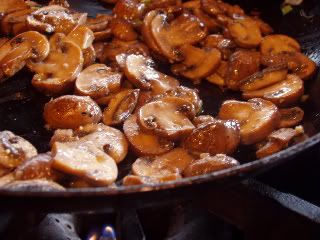
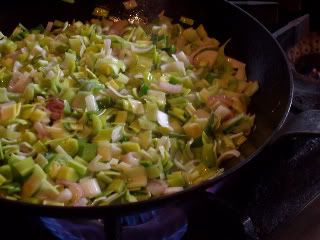
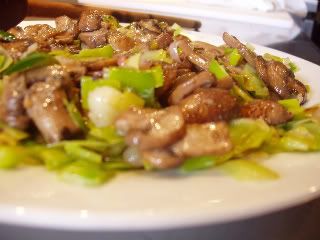
Saute your veggies in a little butter and olive oil. They had some reserved oil leftover from the roasted garlic hanging around, so I used that. The tart was all the better for it. Because of the different cooking times, I did the leeks/shallots in one pan, and the mushrooms in another. I don't think the world will come to an end If you just used one pan. Oh yeah- don't forget to season the vegetables with a little salt and pepper.
Photobucket
Photobucket

Step 3-
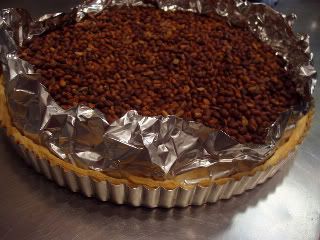
Pour the sauteed veggies out onto a plate to cool, then move onto the crust. Line your tart shell with the dough, then place a large piece of foil inside the dough (leave enough overhang of foil to be able to lift it out later). Fill the shell the pie weight of your choice- rice, dried beans, etc- and bake at 375 degrees for 20 minutes. Remove the foil and pie weights, prick the bottom of the crust a few times with a fork, turn the oven down to 350, and continue baking for 5-7 minutes. The shell should be pale in color, but not raw.
Photobucket
Photobucket

Step 4-
Put it all together. In a small bowl, whisk your eggs, cream, half and half, a pinch of pepper and about a teaspoon of salt until combined. Place your veggies inside the prebaked shell, crumble the goat cheese over the whole thing, then slowly pour in the custard. Bake for 20-25 minutes at 350 degrees, until eggs are set and the tart is slightly puffy.
Photobucket
Photobucket

Cool the tart for a few minutes, then slice and enjoy. Safety note: when feeding hungry boys, keep your limbs out of the way. They could be consumed in the feeding frenzy.

Monday, March 24, 2008

Tart!

Seville Oranges...a love story
Photobucket

Citrus season is winding down. For the next 2 months, until local strawberries are available, rhubarb will be the only gift from the earth I have to work with (and thank you for that dearest, reliable rhubarb. You are always there for me when I am antsy for summer fruit).

Around January or February, apples and pears begin to SUCK. Cranberries are gone, and if you were lucky enough to get your hands on a quince, it has long since been devoured. The next local fruit crop feels like a lifetime away.
Here comes citrus to save the day.
Oh bright, sunny citrus. I just heart you oh so much. Meyer lemons, cara cara oranges, heirloom navels, Texas grapefruit, and my hands-down absolute effing favorite: The super sexy seville orange. Grrrrrawl! They just get me all twitterpated.
Is it a coincidence that my favorite Elvis Costello song is "tart", where he paints a lyrical picture with this very orange? Or that I am literally depressed to be down to my last case of them in the walk-in, with no hope to see another one again until next winter?
No, I think I am in love. With an orange.

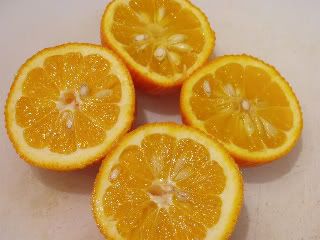
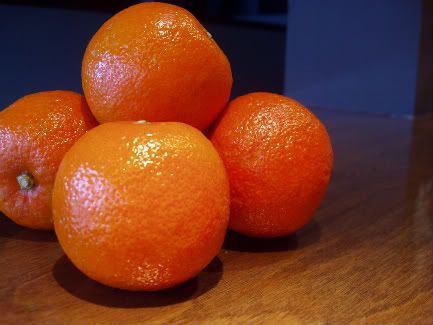
Here is some back story on my sad obsession: Seville oranges come from- you guessed it- Seville, Spain. They have more seeds than any citrus fruit I've ever seen, they are REALLY bitter (I would never eat one out of hand), they have a thick bright orange skin- gorgeous when candied- and are typically used for marmalade.
Photobucket
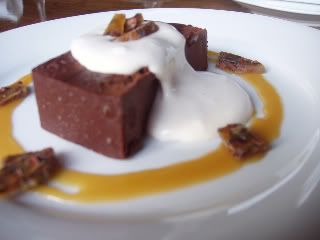
The bitterness of it's juice is more of a pleasant sharpness that enhances food- sort of like a lemon. I love it paired with chocolate, vanilla bean, caramel, or all three- which is how it is currently being showcased on my menu:
Photobucket
Bittersweet Chocolate Pate with Vanilla Bean Cream, Seville Orange Caramel, and Coco- nib Toffee

Unfortunately, I have never seen a seville orange at the grocery store. If you have a year round farmer's market in your area, you may see them there. Otherwise, you'll just have to take my word for it. These guys are worthy of poetry.

Seville Orange Caramel
2 cups sugar
1 cup water
1 tsp lemon juice

2 cups heavy cream

2 seville oranges
1/4 tsp sea salt

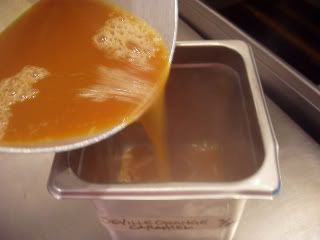
Zest and juice the oranges. Reserve the juice and set aside. Bring the zest and cream to a simmer. Remove from heat, cover, and let steep for 1 hour.
Return steeped cream to the heat, bring to a boil, then strain into a measuring pitcher.
Combine the lemon juice, water, and sugar in a heavy saucepan. Cook until mixture is amber-colored and is just beginning to smoke (don't burn it!...it's a fine line- you don't want to walk away from the stove when caramelizing sugar!)
Remove pan from heat and slowly whisk in the hot cream (stand back- it will hiss and spatter!)
Stir until sugar is dissolved, then stir in the reserved juice and salt.

Photobucket

Friday, March 21, 2008

SHF# 41, sweet gifts for my sis

Almond Butter Cake with Lemon Thyme Cream
Photobucket
Heres your almond cake Brookie, now get off my ass about it, K?

It seems like forever since the last time I participated in Sugar High Friday (or any blog event for that matter), but I am starting to get my act together- dontchya think? I mean jeez, this is my second post in one week. Kudos to me.
Habeas Brulee is hosting SHF this month (follow that link. Now. Seriously, it's worth it to see the freakishly adorable little girl with marshmallow all over her face), and she picked "sweet gifts" as her theme, which gives me the chance to show some love for my sister Brooke. Which I have not yet had a chance to do on this blog.
In a nutshell, Brooke is the most hilarious person I know. I am so glad my parents decided to have another kid right after having me (she is barely a year younger than I, and I don't know that I should use the term "decided", as I'm pretty sure we were both accidents...happy accidents). Some of my most treasured childhood memories include Brooke and I lying on our tummies watching "Anne of Green Gables", making fun of the way they danced on "Kids Incorporated" (children of the 80's who had the disney channel will get the reference- it's where Fergie of the Black eyed Peas got her start in showbiz), or stuffing pillows under our clothers and running down the hallway and colliding into eachother (member that Brooke?). We were always entertained as long as we were together. We didn't require much in the way of toys, as we had our sence of humor to keep us busy. Good lord, could the two of us giggle.
Photobucket
"The Brookester"

Fast forward twenty some odd years, and not much has changed. We're still total dorks when we get together, cracking up at whatever gross or self-depricating joke the other has to tell. In my sister's presence, I somehow become twelve again- which is a pretty awesome state of mind.

Anywho (B- are you sobbing yet? You are. Just admit it.), now on to this cake. This is a cake that was on my menu when Betty first opened, and Brooke and my mom came in for dinner. At that time, it was served alongside a dollop of greek yogurt and a fragrant raspberry-rose geranium sauce. Brooke dubbed it a "mouth-gasm" and has been begging for the recipe ever since.
Being the neglectful beeotch that I am, I kept forgetting to give it to her.
I made this cake for her, but she is an accomplished baker in her own right, so even if she does not have a chance to zip down to Seattle (she live a few towns north of here), she now has the recipe- which is what she really wanted.

Photobucket
Photobucket

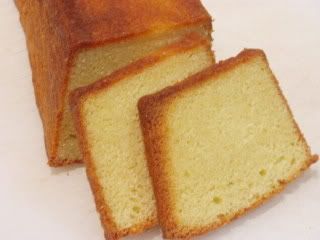
This cake is delicious with just about anything, or on it's own. Today, it's sandwiching a schmear of lemon-thyme pastry cream (lightened to a spreadable consistency with heavy cream). I'll be putting it back on my dessert menu in May with a tangy balsamic-sour cherry compote and toasted almond creme anglaise. Brooke is now drooling.
Almond Butter Cake
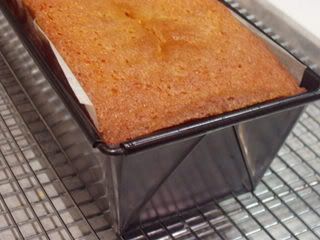
This recipe will produce enough batter for 1 half sheet pan, 2 10" round pans, or 1 terrine loaf pan (my personal favorite).

9 oz (1 1/3 cup) sugar
7 oz almond paste
8 oz butter, softened
6 eggs, at room temp.
1 tsp vanilla
5 oz (1 cup) flour
1 tsp baking powder
3/4 tsp salt

Pre heat the oven to 350 degrees. Spray desired pan with baking release, line the bottom with parchment paper, and spray again.

Sift together the flour, baking powder and salt. Set aside.
In the bowl of a standing mixer fitted with the paddle attatchment, mix the sugar and almond paste together until fine textured (it will have a sandy look). Add the butter and mix until well combined. Stop mixer and scrape the bowl with a spatula. return to med-high.
Whisk the eggs and vanilla together and dribble into the bowl (do this slowly with the machine running). Scrape bowl again and mix until batter looks homogenous.
Add the dry ingredients and mix until just combined.
Spread batter into desired pan and bake until a cake tester comes out clean

Loaf pan: 1 hour to 1 hour 10 minutes
Round pans: 35-40 minutes
Sheet pan: 25-30 minutes

Tuesday, March 18, 2008

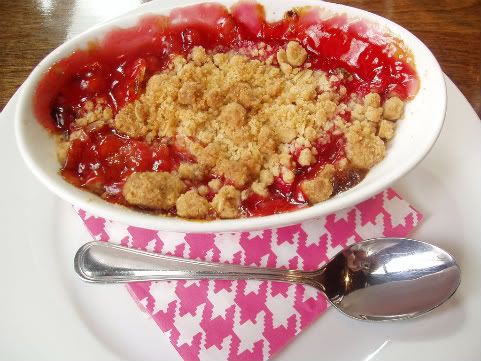
Welcoming Spring with a Rhubarb Crumble

Photobucket
Okay. I'm done hibernating now.
My last post was on New years eve. I'd say it's time for me to quit neglecting my blog. I hope my small group of readers can forgive my absence. I promised the hiatus was over and I guess I kind of lied. I swear it was not intentional. Can we kiss and make up now?

It's been an eventful year so far. I was offered a great opportunity at work, so that is where my head has been for while. The pie lady would just have to wait. I was asked if I would be interested in taking over the pastry department for our sister restaurant Crow, as well as running the helm at Betty (for those who are interested, here is our website).
I accepted, of course, because I would be an idiot to turn down such an incredible proposal. But truth be told, I was terrified. In a good way. The thought of wrapping my brain around two restaurants was a bit scary, but I have found that I work best under pressure, so carpe diem, right?
I am pleased to announce that it's going great. I am starting to get comfy in my new position and am ready to start devoting more free time to this here blog.
So without further ado, hows about a recipe?
Photobucket
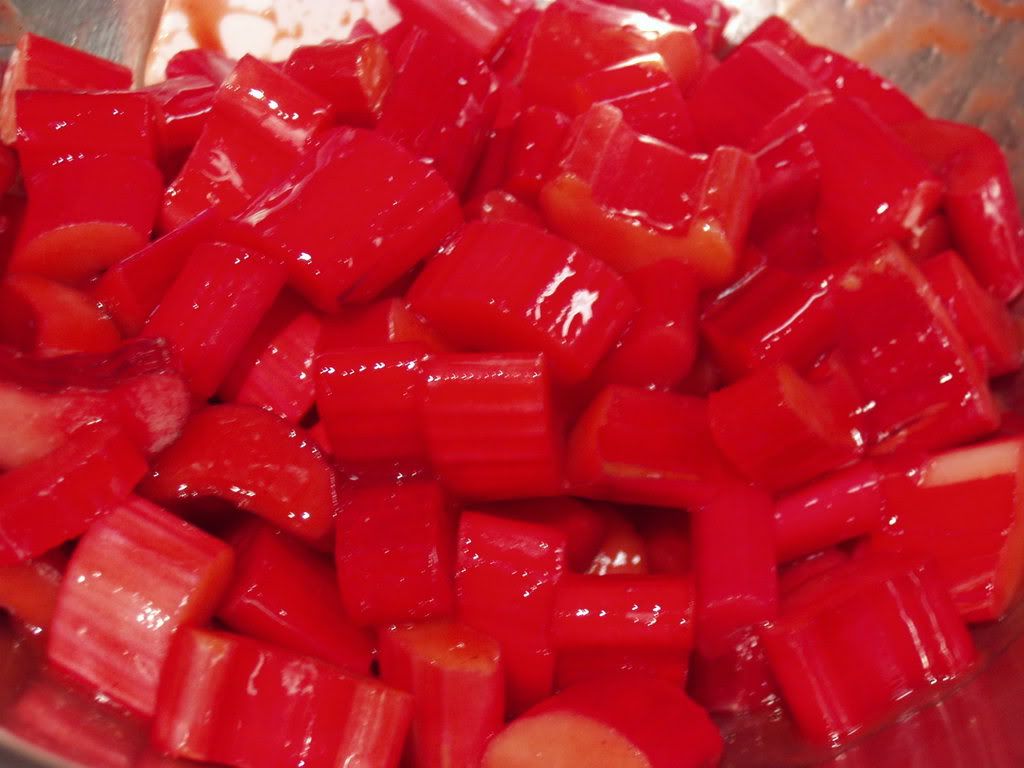
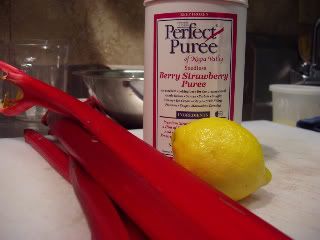
Can I just say hooray for Rhubarb? It showed up early here in the Northwest. Just when I was starting to think "If I have to look at another crappy pear, I will just die" that beautiful red vegetable (yes, rhubarb is a vegetable) mosied it's way into the produce selection looking more crimson and vibrant than ever. Don't get me wrong, I love pears, quinces, and apples, but by February I start to disdain them.
Photobucket
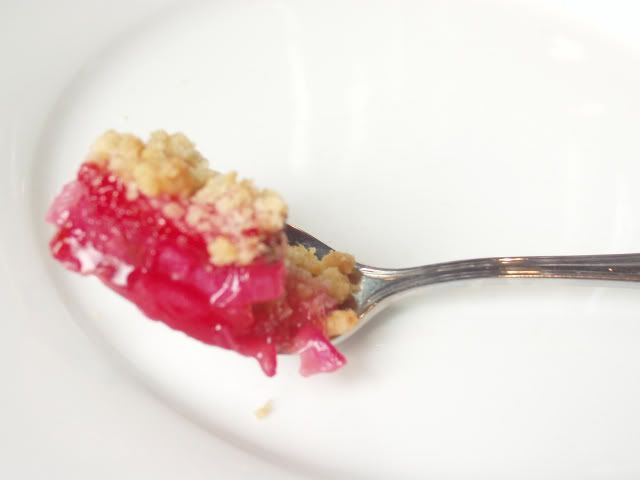
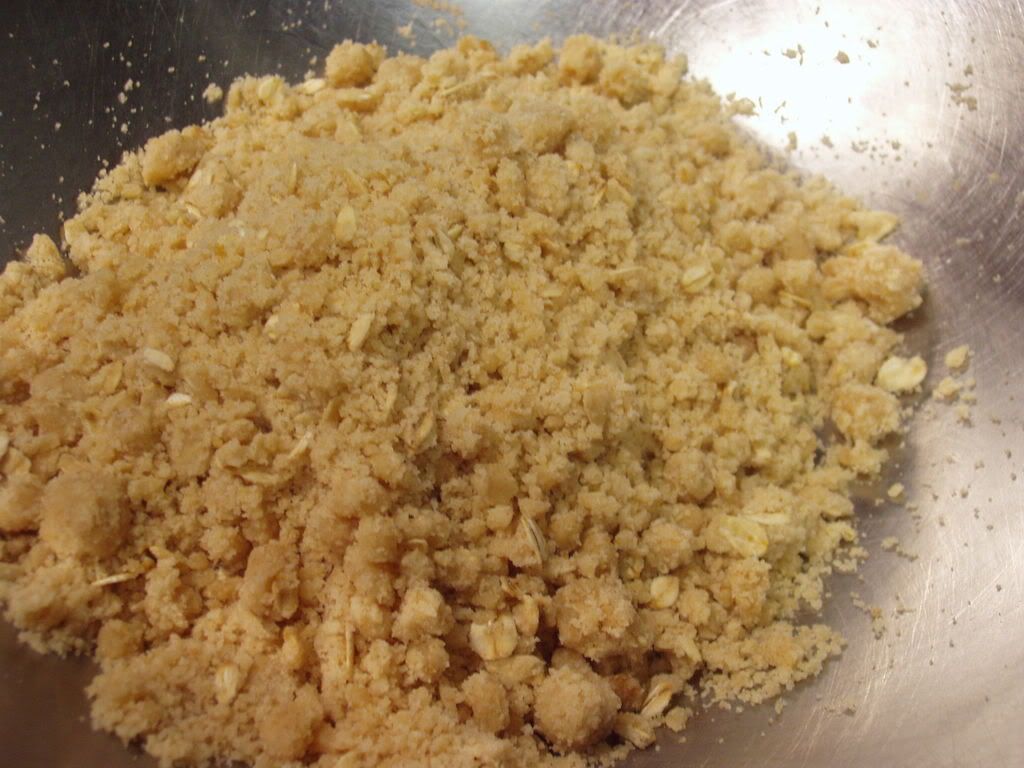
I have already posted Rhubarb pie in this blog's infancy (the pictures make me cringe), so here is another one of my favorite ways to celebrate fruit- a crumble. I make crumbles at home all the time, as they are ridiculously easy. You will most likely have everything you need (sans the fruit) sitting on your pantry shelf. It takes minutes to put together and you can make a huge batch of the topping and freeze it for a last minute dessert.
Photobucket
There is a special ingredient in my filling. I am not usually a fan of rhubarb muddied with strawberries. This is strictly a personal taste thing. I can't STAND baking strawberries. They turn a kind of milky pink color and the texture just bothers me. I think baking a strawberry is sacrilegious.
HOWEVER, a little strawberry puree- just a smidge now- really pumps up the flavor of this filling. It adds sweetness which is nice, so you can reduce the sugar (rhubarb usually needs a lot of sugar), and it adds a little pectin and color. I use a brand available only by mail to the public (I think) called perfect puree. Those who work in kitchens know that it's easily found at many of our produce purveyors. If you like, you can make your own using frozen strawberries, a blender, and a teensy pinch of sugar. Or, you can omit the puree and add a few more tablespoons of sugar. Either way, it will be delicious.
Photobucket
Photobucket


The cherry blossoms are blooming in Seattle, it's been sunny almost as much as it's been rainy, and today I didn't need a coat.
So cozy up with a warm bowl of this crumble (because it's still pretty damn cold out there!), a cup of coffee, and join me in my elation. Spring is just a few days away! Yay!

Rhubarb Crumble
makes 12 individual ramekins or 1 large pan

Topping:
1/4 cup rolled oats
1 1/4 cup flour
1/4 cup brown sugar
1/4 cup granulated sugar
1/4 tsp ground ginger
1/2 tsp salt
4 oz butter, melted and cooled

In a large bowl, mix together the dry ingredients. Add the butter and mix with your hands until you have chunky crumbs. Refrigerate while you prepare the filling.
Filling:
2# 4 oz cleaned rhubarb, ends trimmed and sliced into 1" pieces (give or take-depending on width of the stalks)
2 T fresh lemon juice
1/3 cup strawberry puree*
1 1/3 cup sugar
4 T cornstarch
1/4 tsp salt
2 oz melted butter, plus more for brushing pan

Pre heat the oven to 375 degrees. Butter 12 ramekins, or a 13" by 9" pyrex baking dish and set aside.
In a large bowl, toss rhubarb with the puree (if using) and lemon juice. In a separate small bowl, whisk together the salt, sugar and cornstarch. Sprinkle over the fruit and toss until absorbed. Stir in the melted butter and pour into the baking dish or ramekins. Evenly sprinkle the crumble topping over the rhubarb.
Bake for 25 minutes at 375, then turn oven down to 350 and continue baking for an additional 20-25 minutes. Topping will be golden brown and juices will be bubbly.

*if you are omitting the puree, increase the sugar to 1 1/2 cups

Monday, December 31, 2007

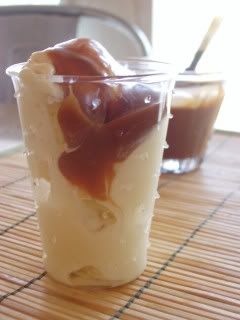
Perfecting Butterscotch

Photobucket

There are few sauces in this world that I love more than butterscotch. It has the gooey richness of caramel, but with a little more moxie. Even the name butterscotch has an allure to it. "butter" and "scotch"- of course it's gonna be good.
But, this innocent little dessert condiment has been irking me since last summer when I had a burnt sugar banana split on my menu.
Photobucket
This was no ordinary banana split. For weeks before the restaurant opened, I had a vision in my head of this glorious dessert, and glorious it was; A banana bruleed with a blow torch, scoops of homemade chocolate, vanilla, and strawberry ice creams-
topped with strawberry sauce, bittersweet fudge sauce, butterscotch, chopped almond praline, sliced strawberries, and a fresh bing cherry. Each order took almost 10 minutes to assemble and to this day, it could very well be one of my finest achievements...with the exception of one thing- I could never get that damn butterscotch right.

I started with a recipe from one of my heroes, Emily Luchetti. Her butterscotch contained all of the usual suspects: brown sugar, butter, cream, salt, etc.
Right off the stove it was quite delicious. After the sauce bottle sat overnight in the fridge however, it was grainy. Still yummy- but the texture simply wouldn't do. Graininess is one of my biggest pet peeves.

Photobucket

Not ready to give up, I tried a recipe given to me by a fellow pastry chef. As I was cooking it, I realized her recipe was pretty much the same as Luchetti's, and I knew I was probably going to have the same problem. So, I cooked it a bit longer to see if that would help dissolve the brown sugar, then I added a shot of whiskey while it cooled. The extra cooking time did nothing for the grainy issue, but the whiskey worked wonders on it's flavor. I had one of those no-duh moments. Why would I even consider making a butterscotch with out any booze in the first place?

With the restaurant in it's infancy at this time, I obviously had a million other things on my plate. I certainly could not linger here in this quagmire. The flavor was very good, and if it were made daily, in small amounts, I could sideswipe the grainy issue. I vowed that I would pick this butterscotch thing back up when I had time to catch my breath.

Fast forward to December, and I have gingerbread on my menu. A dark and spicy wedge with a dollop of Meyer lemon-mascarpone whip (a pillowy blend of Meyer lemon curd, mascarpone, and heavy cream. I will post about it in the future- it's too good not to share), rose poached quince, and a glaze of the infamous butterscotch. Here was my chance to re-visit the texture.

Photobucket

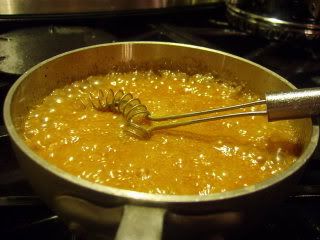
Butterscotch is made in the same procedure as caramel- but you use brown sugar and butter instead of white sugar and water, and you don't caramelize it. Instead, they are melted together, then the cream is added and the sauce boils for a few minutes... It's like "lawyer-ball" caramel.

Photobucket

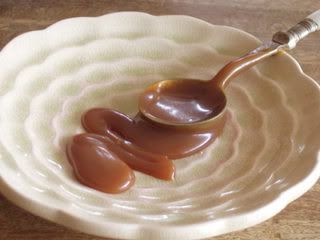
Brown sugar was not only was it the key to butterscotch's flavor, but it was also my roadblock. Brown sugar is basically white sugar with molasses added to it. What if I made a basic creamy caramel sauce, then added molasses, whiskey and salt while it cooled? First time was a charm. I would go so far as to call it perfect. I was pissed off that my brain didn't make that connection back in the banana split days.

The hubby and I have been enjoying homemade cinnamon stick ice cream and butterscotch sundaes for dessert over the holidays. Luckily, we polished off the last of it last night- just in time for my new years resolution to decrease the size of my bum!

Butterscotch
This sauce can be refrigerated in a sealed container for at least 2 weeks. To bring it back to it's original saucy lustre, re heat it slowly over the stove, or in the microwave.
Makes about 1 cup

1/2 cup granulated sugar
1/4 cup water

3/4 cup cream
1 oz unsalted butter, cut into cubes

2 T molasses
1/4 tsp fine sea salt
2 T whiskey (I like Yukon Jack for it's sweetness)

In a small sauce pan, combine sugar and water. Cook over high heat until it' caramelizes. This takes a while longer due to the extra amount of water.
Meanwhile, in a separate sauce pan, combine the butter and cream. Bring to a simmer and let sit until the sugar has caramelized.
Off the heat, slowly and carefully whisk in the hot cream. The pot will spatter and spit- look out!
Whisk over gentle heat until sauce is smooth and lump-free. Strain into a heat proof container, then stir in molasses, whiskey, and salt
.
Photobucket
Happy New Year!

Thursday, December 27, 2007

Multigrain Sandwich Bread (The Pie Lady Returns!)

Photobucket
Something has been missing from The Pie Lady. Blog posts!
December has been a strange month. More like a comedy of errors. In a matter of a few days the alternator went out on our car, my wallet was stolen, our refrigerator broke, and our computer both caught some sort of virus and the hard drive crashed. Needless to say, I have not had the opportunity to blog as much as I would like to. It's been such a chapper to have to put it aside just when it's just getting off the ground- and I miss my new blogging buddies!

Things are starting to calm down around here- car fixed, fridge fixed, driver's licence/credit cards renewed (the punks managed to use my card at a gas station before I had a chance to cancel it. Happy holidays to you too, arshole).
The final clusterphuk to deal with is the computer. Luckily, I do have access to one for the time being. So, while posts may not be as frequent as usual- the hiatus is over.

Now that I've explained myself- I will move on to the yummiest sandwich bread that I have ever tasted. I know- my last post was bread, but trust me. I would not dare to be so redundant unless it was worth it.
Photobucket
I doubt I have mentioned this, but nothing tickles my fancy more than getting my Cooks Illustrated in the mail. I have subscribed for 3 years, and find myself buying less general cookbooks because of it. The recipes in Cooks Illustrated are so well tested and often offer variations, so once I've tried it, I (usually) don't feel the need to seek out other versions.
Photobucket
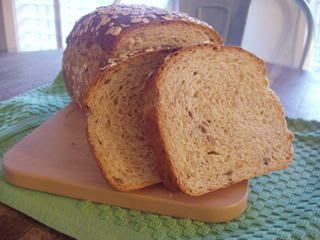
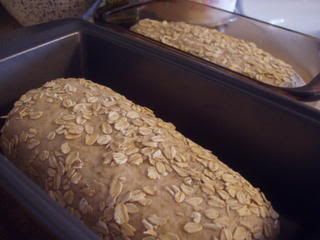
The multigrain sandwich bread caught my eye in the March/April '06 issue. The test cook had the brilliant idea to use 7 grain cereal mix, rather than hunting them down individually. This is one of the easiest bread recipes I know, so I don't mind putting it together the day after the holiday cooking marathon...(by the way- Happy Holidays everyone).
Photobucket
Just in time for turkey or roast beef leftovers, this sandwich bread tastes better than anything you can buy in the grocery store. Leftovers on homemade bread makes you feel like you're having a meal just as special as the night before.

Photobucket
Easy Multigrain Sandwich Bread- Cooks Illustrated #79, Mar/Apr '06

6 1/4 oz (1 1/4 cups) 7-grain hot cereal mix (Bob's Red Mill or Arrowhead Mills)
20 oz (2 1/2 cups) boiling water
15 oz (3 cups) unbleached all-purpose flour
7 1/2 oz (1 1/2 cups) whole wheat flour
4 T honey
4 T butter, melted and cooled slightly
2 1/2 tsp instant yeast
1 T fine sea salt
3/4 cup unsalted sunflower or pumpkin seeds (*I like sunflower the best)
1/2 cup old-fashioned rolled oats

1. Place cereal mix in bowl of standing mixer and pour boiling water over it; let stand, stirring occasionally, until mixture cools to 100 degrees and resembles thick porridge, about 1 hour. Whisk flours together in a medium bowl.

2. Once grain mixture has cooled, add honey, melted butter, and yeast and stir to combine. Attach bowl to standing mixer fitted with dough hook. With mixer running on low speed, add flours, 1/2 cup at a time, and knead until dough forms ball, 1 1/2 to 2 minutes; cover bowl with plastic and let dough rest 20 minutes. Add salt and knead on medium-low speed until dough clears sides of bowl, 3 to 4 minutes (if it does not clear sides, add 2 to 3 T additional all-purpose flour and continue mixing); continue to knead dough for 5 minutes. Add seeds and knead another 15 seconds. Transfer dough to floured work surface and knead by hand until seeds are dispersed evenly and dough forms smooth, taut ball. Place dough into a greased container with 4-qt capacity; cover with plastic and allow to rise until doubled, 45 to 60 minutes.

3. Adjust oven rack to middle position; heat oven to 375 degrees. Spray 2 9by 5- inch loaf pans with nonstick cooking spray. Transfer dough to lightly floured work surface and pat into a 12 by 9- inch rectangle; cut in half crosswise with knife or bench scraper. Roll each portion into a log and pinch the seam closed. Spray each log with water and roll in the oats. Place in loaf pans, cover lightly with plastic wrap and let rise until almost doubled in size, 30 to 40 minutes.

4. Bake until internal temperature registers 200 degrees on an instant read thermometer, 35 to 40 minutes. Remove loaves from pans and cool on wire rack before slicing, about 3 hours.


Photobucket

Monday, November 19, 2007

Daring Bakers on a "diet"

Photo Sharing and Video Hosting at Photobucket
A pot of coffee and a daring baker challenge. My ideal day off

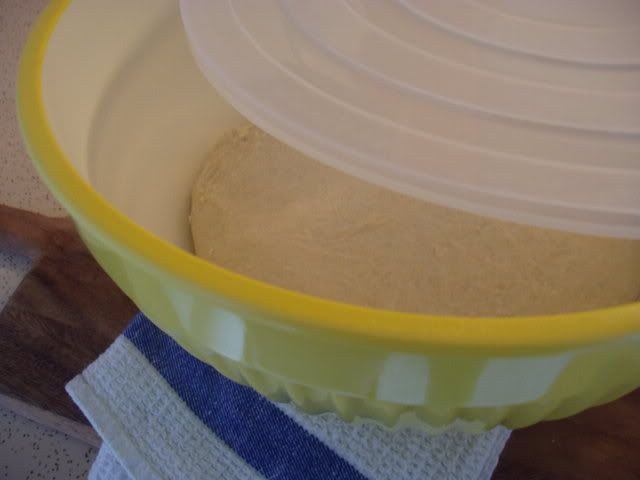
Yeasted delicacies are showing up on blogs everywhere, which can only mean the daring bakers are at it again with Tanna hosting this month's challenge. After October's bostini cream pie, which came in at a whopping 93 grams of fat and almost 1200 calories PER SERVING (thanks again Julius, I can't say that I really wanted to know about that. Sometimes, ignorance really is bliss), myself and several other db's had our fingers crossed for something savory, and perhaps something we could eat a serving of without having to go buy new jeans. Tanna valiantly answered the call with Tender Potato Bread. Those who are carb conscience are rolling their eyes right now because I just said "potato" and "bread." Sorry...it's not my stupid diet. I for one, was ecstatic. Tanna was giving us creative freedom with this. She provided the recipe for the dough, advised that we make a loaf with half of it, and the rest should be used as a canvas to "unleash our inner daring baker." We were allowed to do whatever we wanted with it, so long as it wasn't sweet. Another rule: the dough had to be kneaded by hand. No mixers allowed.

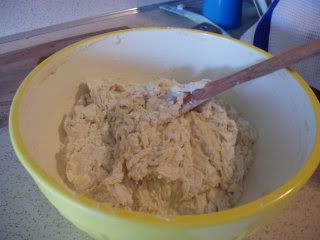
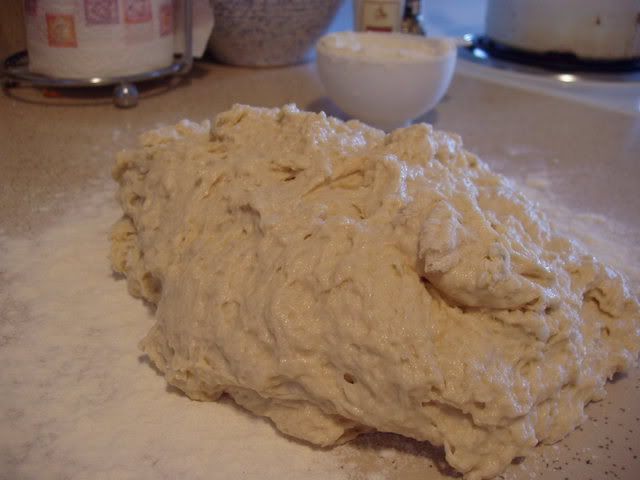
As the db's started making this challenge and posting their results on our private blog, the overwhelming majority warned that this was a really sticky dough.
I consider myself to be pretty comfortable with bread making. I am by no means an expert, but running the wholesale bakery forced me to become familiar with it. Cinnamon rolls and hot cross buns were two of my biggest sellers, and I was also asked to make the ciabatta for the dinner theatre that I shared the kitchen with. Ciabatta is one of the stickiest, most difficult to work with breads out there, which is why it is always in that flat rectangular blob shape. I told myself that If I can handle ciabatta, I can handle this. Here's the thing though: I made the ciabatta in an enormous 60 quart mixer, and both the rising and forming was done on a big wooden bench. I'll admit it- the idea of kneading the sticky potato bread on my tiny formica counter top had me nervous. If anything the clean up that would be required was not something I was looking forward to. But, that is the whole idea of these challenges. Step outside your comfort zone. To me, artisan style bread making is not a big deal. Doing it at home without my mixer? SCARY.

Photo Sharing and Video Hosting at Photobucket

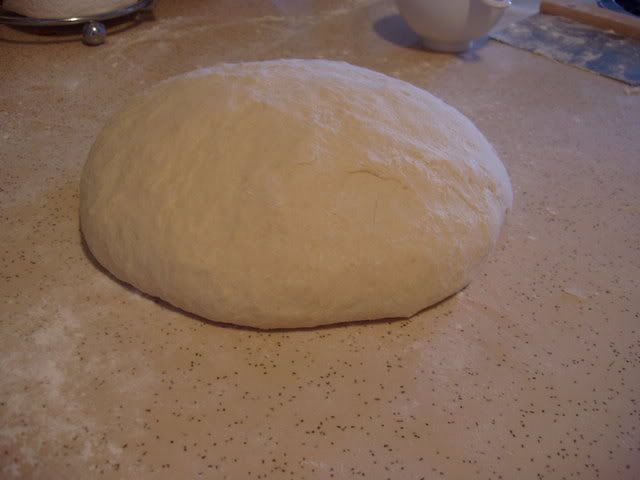
Luckily, Tanna's recipe was really straight forward- and yes, the dough was sticky at first. But once you start kneading, it becomes the most fun thing to play with EVER. Sorry if I am grossing anyone out here, but the texture of the dough can only be described as old lady arm flab. It reminded me of going to visit my great aunt Charlotte and giving her a hug. The dough picks up just enough flour to hold together, but remains very soft and "blubbery."
I have kneaded dough by hand before, but it was not quite as slack as this one. Stiffer dough means your arms tire out quickly. I could have kneaded this dough all day. I forgot how much more satisfying it is to actually feel it come together.
Photo Sharing and Video Hosting at Photobucket
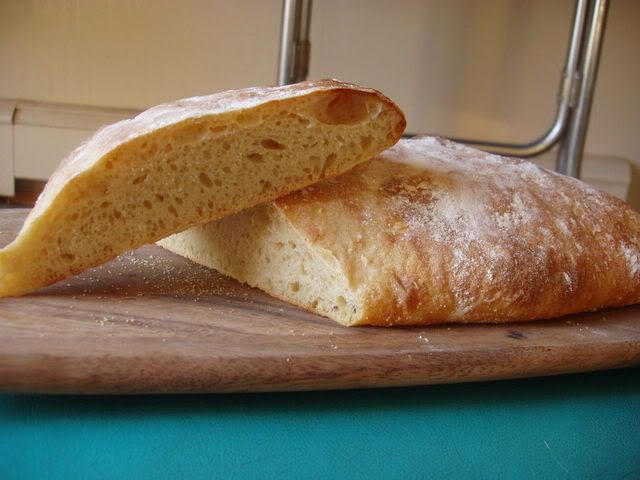
One third of my finished dough became a rustic free form loaf, which I baked right on my pizza stone. The crust was crisp and the inside was tender and fluffy. It was delicious the next day as garlic toast for soup.
Photo Sharing and Video Hosting at Photobucket
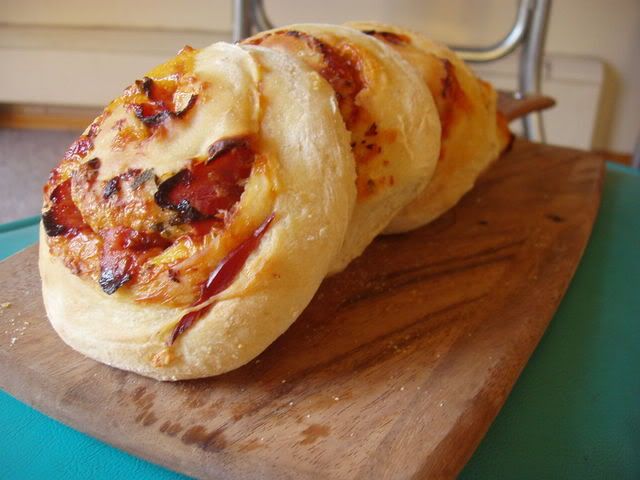
The rest became something that I usually make with plain buttermilk dough: cheddar ham rolls with sage. The dough is rolled out into a rectangle as if you were making cinnamon rolls. Sprinkle with shredded cheddar and chopped sage. Lay out slices of good quality deli ham, then sprinkle with more cheese and sage. Roll it up and slice off medallions. Bake them just like you would a cinnamon roll. We had them for dinner with a salad. How often does a daring baker challenge become two perfectly well rounded dinners? Um, NEVER. Thank you Tanna. This was a great choice after last months heart attack cream pie. If you would like the recipe for Tender Potato Brad, Tanna has it posted on her blog. To see all of the other amazing creations that resulted from this dough, head over to our blogroll. I know that is where I'll be for the next 3 weeks, as there are (last I checked, I'm sure there's more by now) now about 300 daring bakers across the globe!! Thats alotta dough!
Photo Sharing and Video Hosting at Photobucket


Thanks Norm!